Objective
Create a shopping application with Samsung Blockchain Platform SDK and pay using Ethereum network.
Overview
The Blockchain industry is expanding in many ways. It is growing the most as a means of payment. Samsung Blockchain Platform SDK helps to make payments easily with cryptocurrency. You can interact with Blockchain through a simple API call to create a transaction.
In this Code Lab, you can pay for a product using the Ethereum network in a simple shopping app, which is a Decentralized Application (DApp). DApps run and store data on the Blockchain network instead of a central server.
For more information, go to Samsung Blockchain Platform SDK.
Set up your environment
You will need the following:
- Java SE Development Kit 8 or later
- Android Studio (latest version recommended)
- Mobile phone with Samsung Blockchain
Sample Code
Here is a sample code for you to start coding in this Code Lab. Download it and start your learning experience!
Shopping App Sample Code (3.6 MB)
Enable developer mode
To activate Developer Mode on your mobile device, follow the steps below:
- Navigate through Settings > Biometrics and security > Samsung Blockchain Keystore and click About Blockchain Keystore.
- Tap the Samsung Blockchain Keystore app name quickly, ten times or more.
- If succeeded, (Developer Mode) will show.

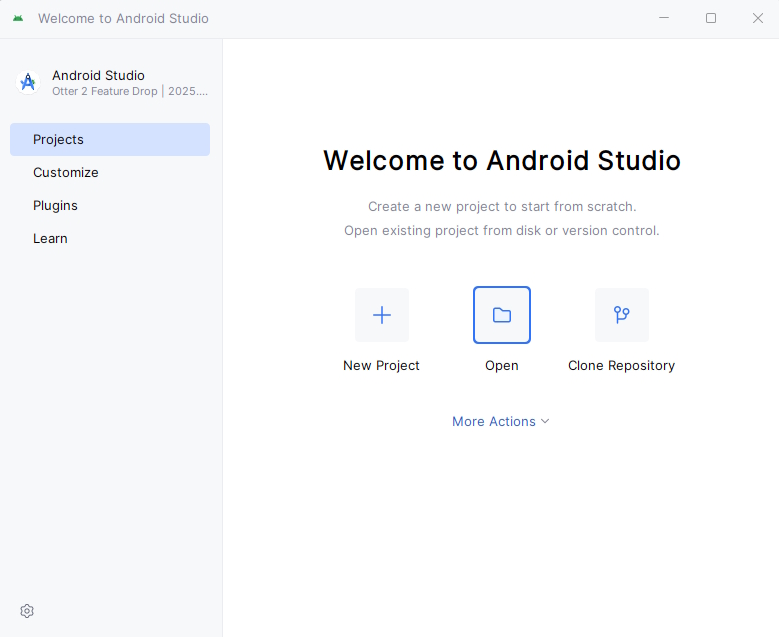
Start your project
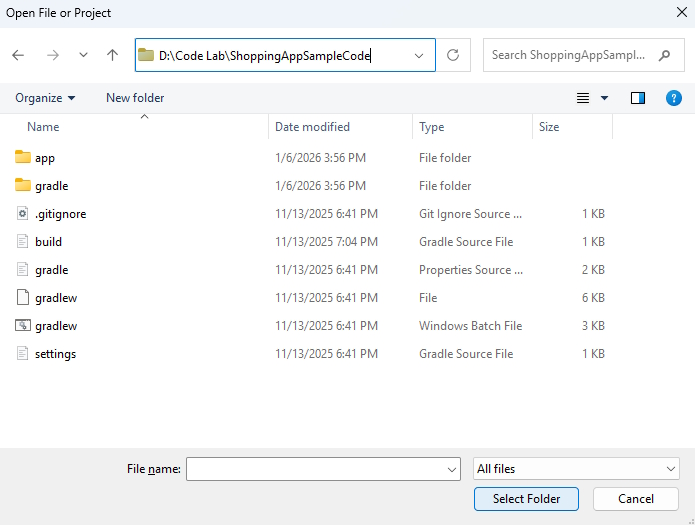
In Android Studio, click Open to open an existing project.
Locate the downloaded sample project and click OK.
Initialize the instance
Create an Sblockchain instance. This is the first step since Sblockchain is the initial base class of SDK.
Along with that are:
HardwareWalletManager: responsible for wallet operationsAccountManager: responsible for account operations
mSBlockchain = new SBlockchain();
mSBlockchain.initialize(mContext);
mAccountManager = mSBlockchain.getAccountManager();
mHardwareWalletManager = mSBlockchain.getHardwareWalletManager();
mCoinNetworkInfo =
        new CoinNetworkInfo(
                CoinType.ETH,
                EthereumNetworkType.SEPOLIA,
                rpcUrl
        );

connectToKeyStore();
Connect to Samsung Blockchain Keystore
You can get hardware wallet instance from HardwareWalletManager. HardwareWalletType refers to the type of cold wallet to be connected, such as Samsung Blockchain Keystore and Ledger Nano S.
mHardwareWalletManager
        .connect(
                HardwareWalletType.SAMSUNG,
                false
        ).setCallback(new ListenableFutureTask.Callback<HardwareWallet>() {

    @Override
    public void onSuccess(HardwareWallet hardwareWallet) {
        handler.post(new Runnable() {
            @Override
            public void run() {
                Log.i(TAG,"HardwareWallet is connected Successfully");

                mProgressBar.setVisibility(View.INVISIBLE);
                setAccountStatus();
            }
        });
    }

    @Override
    public void onFailure(@NotNull ExecutionException e) {

        mProgressBar.setVisibility(View.INVISIBLE);
        e.printStackTrace();
    }

    @Override
    public void onCancelled(@NotNull InterruptedException e) {

        mProgressBar.setVisibility(View.INVISIBLE);
        e.printStackTrace();
    }
});
The second parameter of connect API refers to reset. If you do not want to reset the wallet then keep it false, otherwise true.
Manage your account
Now, your shopping DApp is connected to the Keystore. It means that if you have your own account with balance, you can now buy using Ether (or ETH). Let's create an Ethereum account to be used for payment.
For generating a new account with Samsung Blockchain Platform SDK you need an instance of the AccountManager from SBlockchain. AccountManager provides methods for fetching, creating, restoring accounts, and other more. Once you have an instance of AccountManager, you can call generateNewAccount as shown below. It has methods regarding accounts such as get, create, and restore. Refer to the Samsung Blockchain Platform SDK documentations for more details.
HardwareWallet connectedHardwareWallet =
	mHardwareWalletManager.getConnectedHardwareWallet();

if (connectedHardwareWallet != null) {
    try {
	mAccountManager.generateNewAccount(connectedHardwareWallet, mCoinNetworkInfo).get();
    } catch (InterruptedException e) {
	e.printStackTrace();
    } catch (ExecutionException e) {
	e.printStackTrace();
    }
}
If an account is already created, TextView is shown at the top of the app and the Create Account button is disabled to prevent further account creation.
List<Account> accounts =
        mAccountManager
                .getAccounts(
                        null,
                        CoinType.ETH,
                        EthereumNetworkType.SEPOLIA
                );

if (!accounts.isEmpty()) {
    mEthereumAccount = (EthereumAccount) accounts.get(accounts.size() - 1);
    tvAccountStatus.setText(mEthereumAccount.getAddress());
    btnCreateAccount.setEnabled(false);
}
Get instance for Ledger Service
After creating an account, you can use it for payment in your shopping DApp. Each coin (blockchain ledgers) has its own system to be stored in blocks. Samsung Blockchain Platform SDK provides abstracted API sets to developers for signing and sending supported cryptocurrency transactions over the Blockchain network. Create CoinServiceFactory and just use any ledger you want. In this scenario, use EthereumService.
EthereumService service =
        (EthereumService) CoinServiceFactory.getCoinService(mContext, mCoinNetworkInfo);
At this point, your shopping DApp is ready to provide payment methods working on Ethereum.
NoteBefore the next step, you need at least one valid Ethereum account.
Show payment sheet
When a user selects an item, the app should show the payment screen. It must show “Who will pay HOW MUCH Amount of ETHER to Whom”. In the Blockchain world, Ethereum ledgers require more information, such as transaction nonce, to record that transaction into ledgers. With Samsung Blockchain Platform SDK, developers can do everything needed.
To show the payment sheet, intent should be created, which is to call the payment activity on click event of product object. Fill the parameters required and startActivityForResult() to show a payment sheet.
Item item = itemList.get(position);
BigInteger price = EthereumUtils.convertEthToWei(item.getPrice());


HardwareWallet connectedHardwareWallet =
        mHardwareWalletManager.getConnectedHardwareWallet();

Intent intent =
        service
                .createEthereumPaymentSheetActivityIntent(
                        mContext,
                        connectedHardwareWallet,
                        EthereumTransactionType.EIP1559,
                        mEthereumAccount,
                        SAMPLE_TO_ADDERSS,
                        price,
                        null,
                        null
                );

startActivityForResult(intent, 0);
Run the app
After building the APK, install the app on a Samsung Galaxy device.
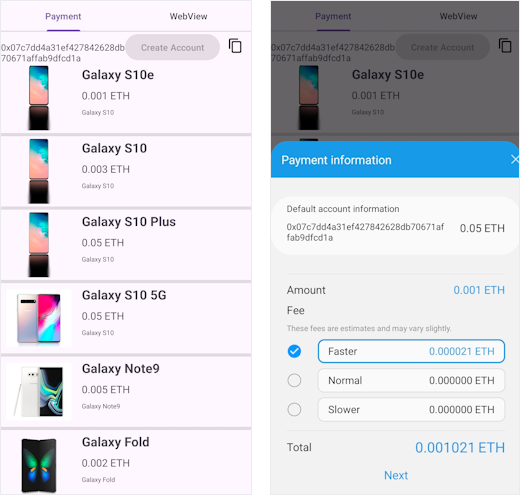
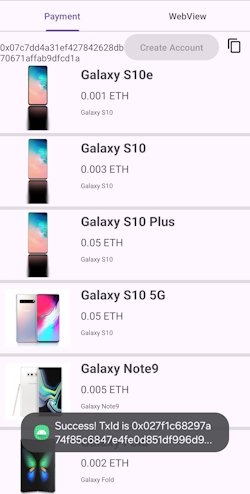
- From the Payment tab, click Create Account to generate your wallet address.
- Copy the generated address.
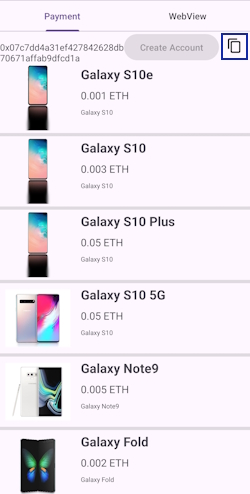
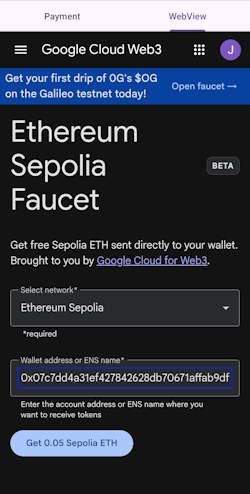
You need currency to make any purchases. A free faucet site is provided in the WebView tab to obtain Ether.
- Go to the WebView tab and log in using your Google account.
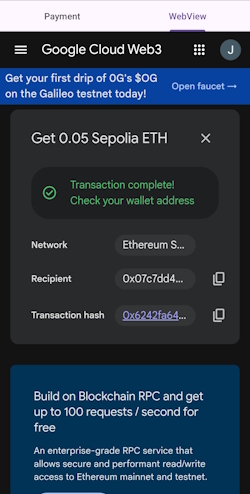
- Enter the copied wallet address and press Get 0.05 Sepolia ETH.
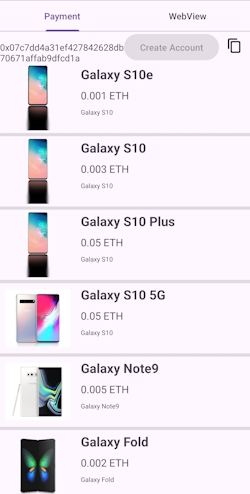
- Return to the Payment tab and select any product from the list.
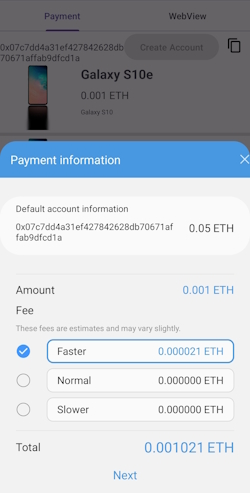
- In the Payment information screen, select a fee to pay to the Ethereum network and click Next to proceed.
- Confirm the transaction. A success toast message will appear upon a successful transaction.
See the result of transaction
If the payment was performed successfully from the payment screen, the result of transaction can be received from onActivityResult. If the transaction is performed properly, you can find the RESULT_OK at resultCode. From the intent, a txid is shown which can be used to check your transaction's status.
-
Call getTransactionDetail(txid: String) API (method in EthereumService) and check the block#. If there's any valid countable number, your transaction is stored in blocks successfully and the payment is done. If you can't find it, just wait. It's processing among Ethereum nodes.
-
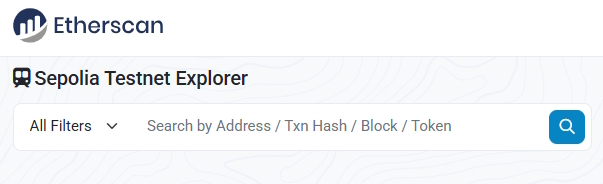
Alternatively, simply find the txid in Sepolia Testnet Explorer.
You're done!
Congratulations! You have successfully achieved the goal of this Code Lab. Now, you can develop a shopping DApp using Samsung Blockchain Platform SDK by yourself! If you're having trouble, you may download this file:
Shopping App Complete Code (3.6 MB)
To learn more, explore Samsung Blockchain.