Optimize your watch face design
Objective
Learn how to optimize watch face designs created in Watch Face Studio by minimizing memory usage and reducing the On Pixel Ratio.

Overview
Starting from Watch Face Studio (WFS) version 1.6, watch face developers can now utilize the Memory Usage plugin during development to monitor the memory consumption of their watch faces. This tool ensures that projects adhere to Google's defined memory requirements.
Another valuable feature of WFS is the AOD (Always-On Display) Analyzer, which evaluates the contribution of each component to the On Pixel Ratio (OPR). The OPR indicates the number of pixels that remain lit in AOD mode. Since a higher OPR results in more lit pixels, it directly impacts battery life. The AOD Analyzer helps identify which layers, colors, or visual elements consume the most power, enabling developers to optimize designs for better energy efficiency.
Both tools are essential for enhancing overall performance and user experience. Excessive memory usage can lead to lag and instability, while a high OPR accelerates battery drain. By understanding and balancing these metrics, developers can create visually dynamic and appealing watch faces while ensuring they remain optimized for power consumption and system efficiency.
Set up your environment
You will need the following:
Sample Project
Here is a sample project for this Code Lab. Download it and start your learning experience!
Optimize Watch Face Sample Project (1.1 MB)
Start your project
To load the sample project in Watch Face Studio:
- Click Open Project in Watch Face Studio.

- Locate the downloaded sample project and click Open.

The sample project includes a design with high memory usage and OPR.

Check watch face’s initial memory usage and run AOD Analyzer
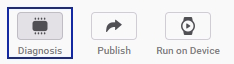
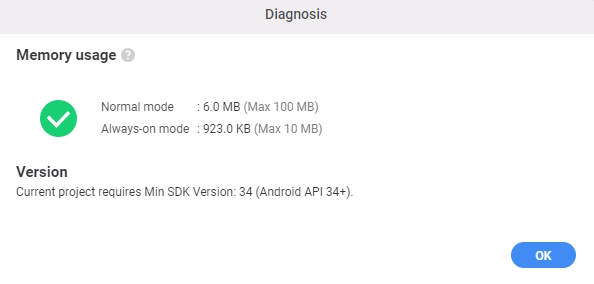
- Click the Diagnosis button to check the memory usage of the watch face.

While the diagnosis result indicates that the current memory usage of the watch face is significantly below the memory budget, which is 100 MB for normal mode and 10 MB for always-on mode (see WO-P8 in Performance and Functionality requirements), it still consumes a considerable amount of memory. This is notable given its simple design and lack of complex graphics.
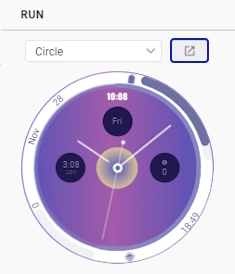
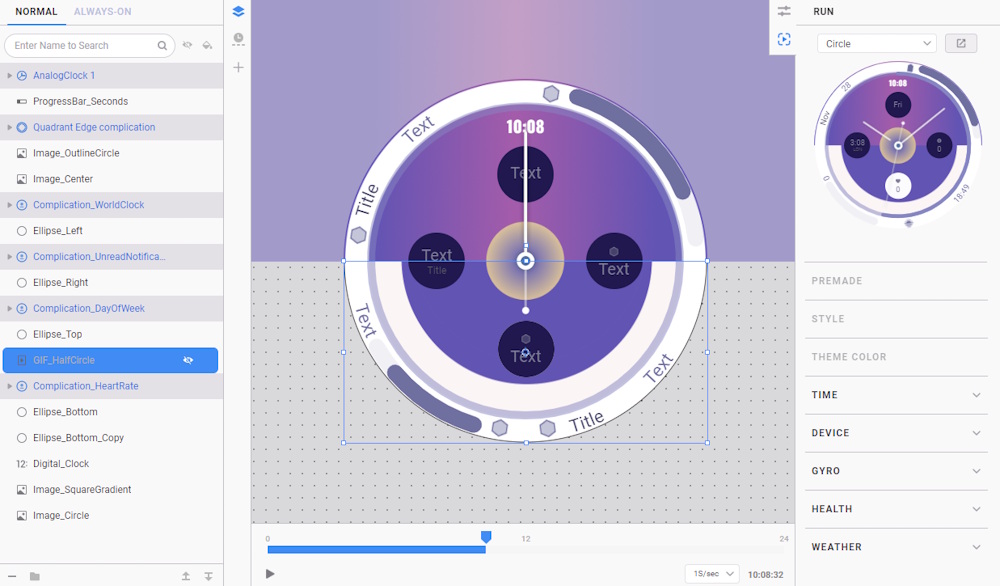
- Next, go to the Run pane and click the Preview Watch Face icon.
- In the Preview Watch Face window, toggle the Always-on State to see the watch face in ambient mode.
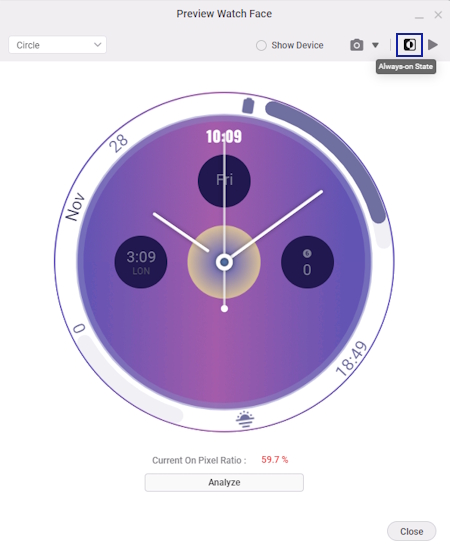
The current OPR of the watch face is 59.7%. It is recommended that your design uses no more than 15% of the available pixels in always-on states. (See WO-P7 in Performance and Functionality requirements)
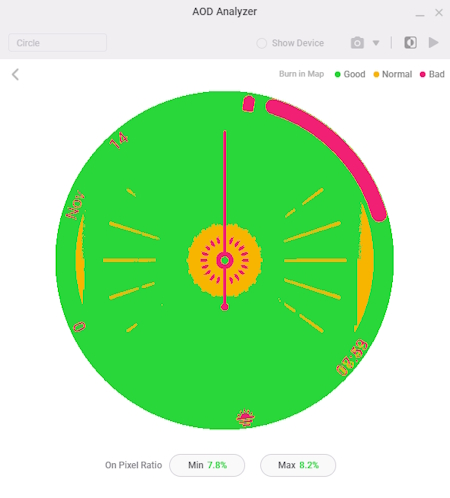
- Click Analyze to open the AOD Analyzer, a tool that checks each watch face component and color-codes how much each component contributes to the OPR.

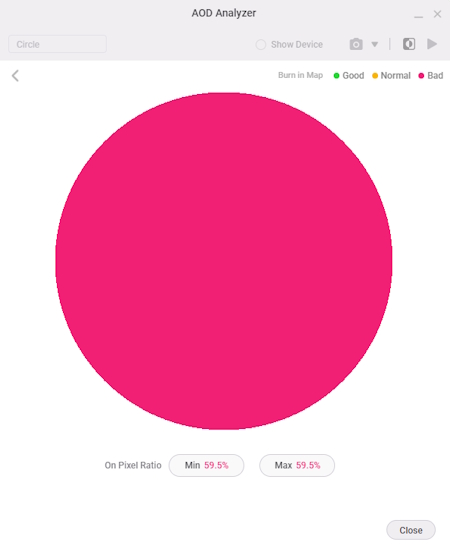
The AOD Analyzer indicates that the watch face design contains pixel-intensive components, which increase the OPR. Adjusting these components to stay within the 15% OPR limit for both AOD mode and normal mode can improve power efficiency and battery life.
Adjust colors and sizes of components
Using dark colors in your watch face reduces power consumption, which applies to both always-on and normal modes.
Additionally, higher-resolution bitmap assets consume more memory.
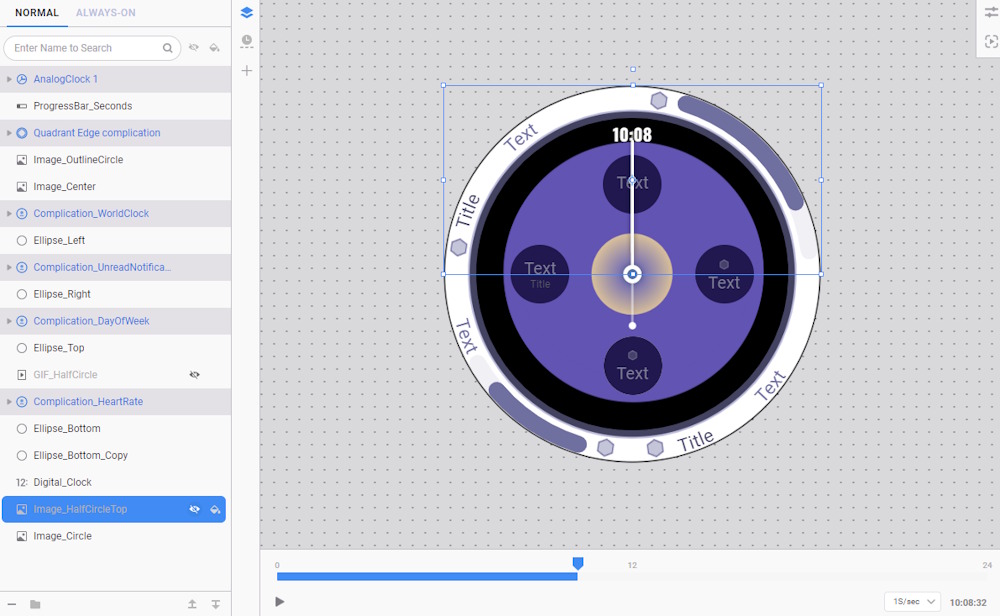
In the sample project, you can find very bright-colored and unnecessarily high-resolution images with extra transparent pixels that can be optimized.
- Go to the layer list and hide the GIF_HalfCircle layer temporarily to view the components behind it.
- Click on any empty space in the layer list to view the canvas color of the watch face. Currently, the color is set to #fbf5f5ff (off-white), which is a very light color and can significantly increase the OPR.
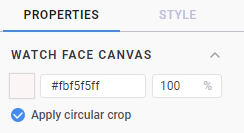
- Change the canvas color to #000000ff (black). You can also select other dark colors that you prefer.

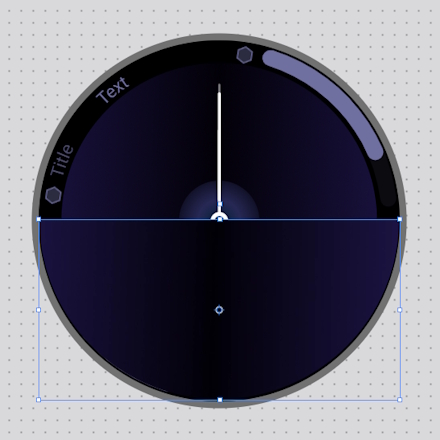
- Next, select the Image_SquareGradient layer.
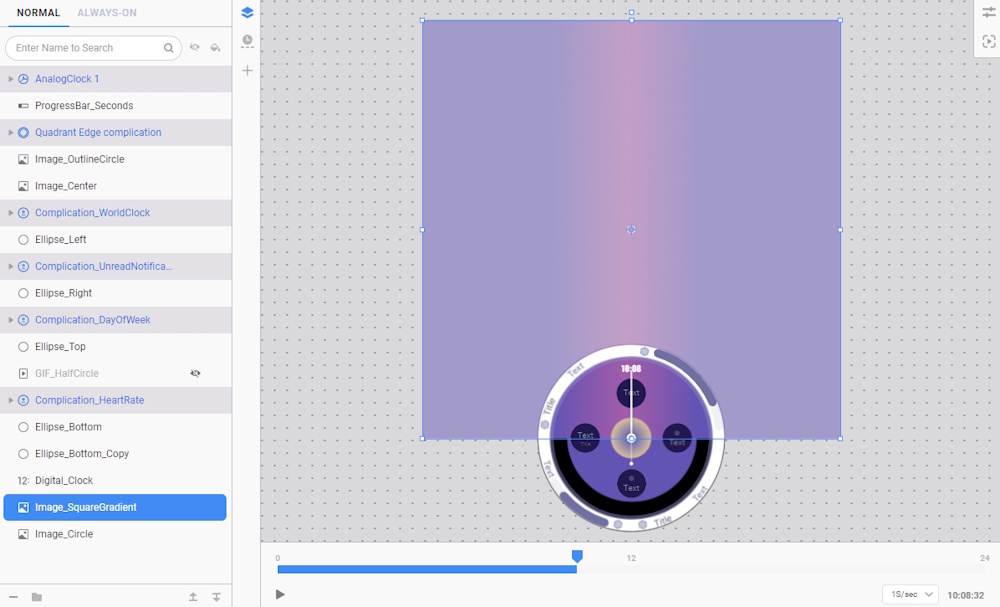
- This image is unnecessarily high-resolution, with only a portion of it displayed on the screen. You need to crop images like this first using photo editing software before importing them into the studio.
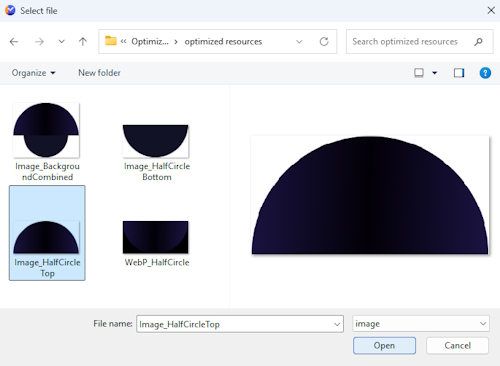
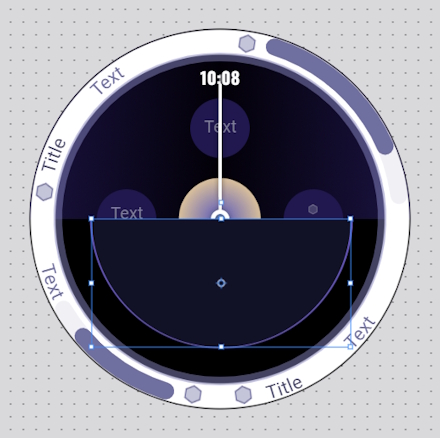
- An optimized version of this image is ready for you to add. Go to Add Component > Preset image.
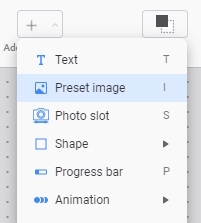
- Select the Image_HalfCircleTop.png file from optimized resources folder included in the sample project.
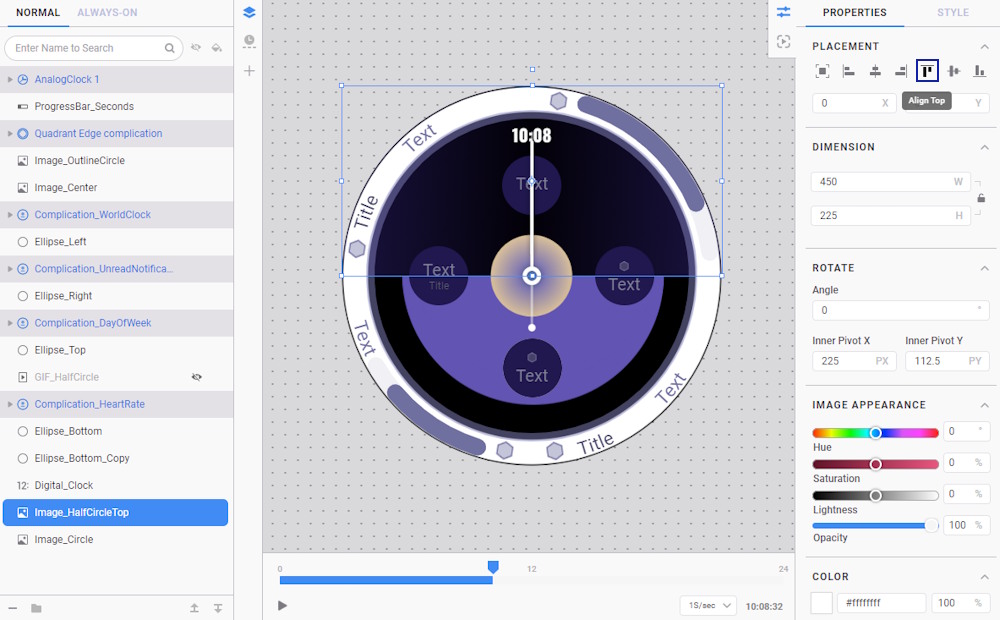
- Drag the newly added image layer and place it above the Image_SquareGradient layer. Then, delete the Image_SquareGradient layer.
- Select the Image_HalfCircleTop layer and, in the Placement properties, choose Align Top.
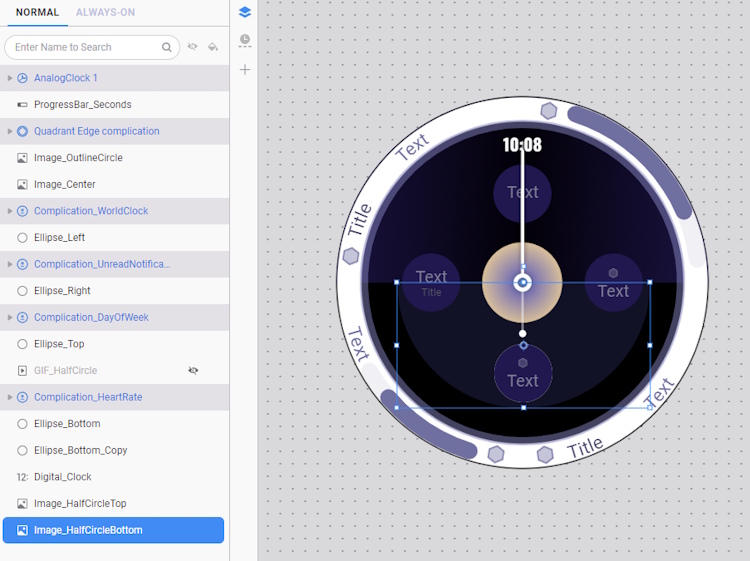
- Next, select the Image_Circle layer.
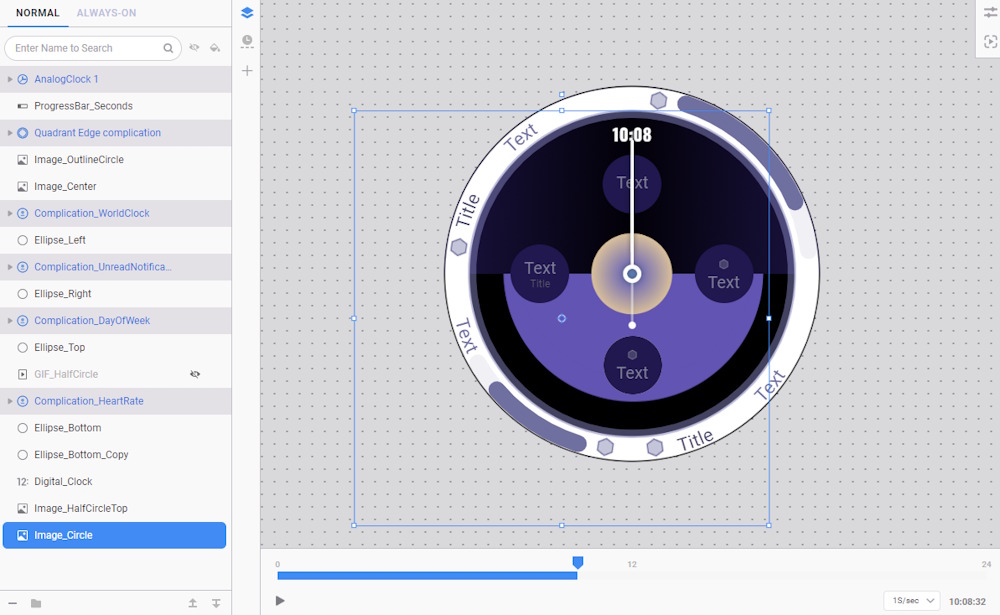
- By hiding the layer on top of it, you can see that half of the image is covered but still takes up space and affects performance as it is partially rendered. Additionally, the image has extra transparent pixels that are unnecessary.
- Crop this image or, from the optimized resources folder, add the Image_HalfCircleBottom.png file.
- Adjust it placement like below:
- Drag the Image_HalfCircleBottom layer above the Image_Circle layer. Then, delete the Image_Circle layer.
-
You can combine images with the same purpose using any photo editing software, as this consumes less memory, particularly when working with high-quality complex graphics such as logos, illustrations, and textures.
-
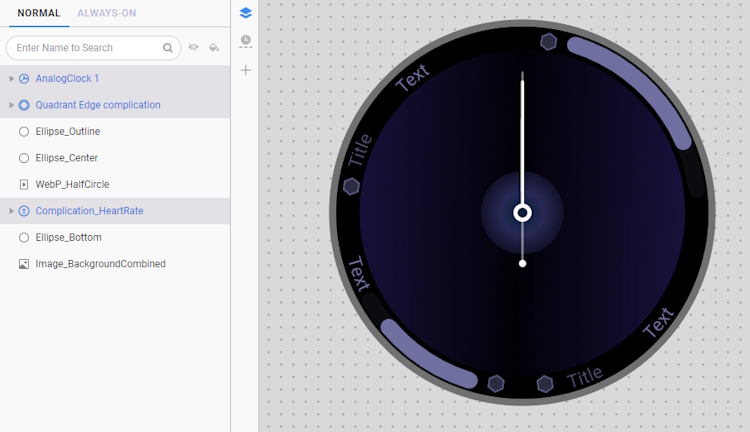
From the optimized resources folder, add the Image_BackgroundCombined.png file and align it as shown below:
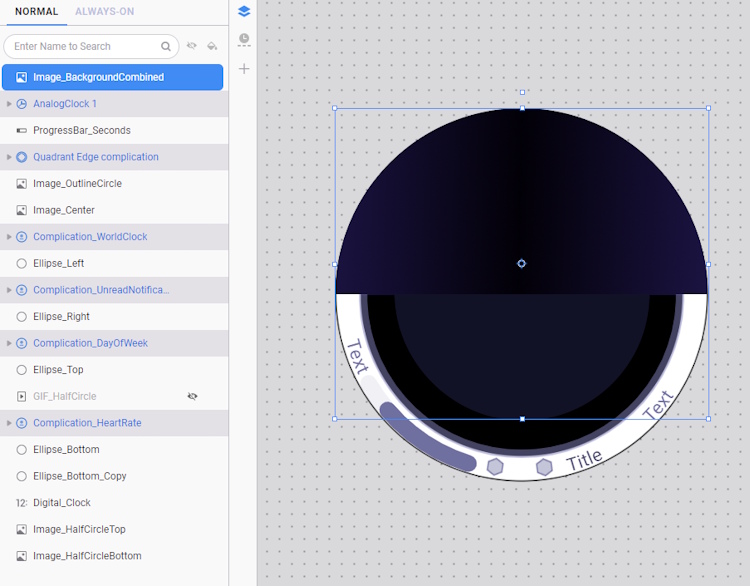
- Drag the newly added image layer above the Image_HalfCircleTop layer, and then delete both the Image_HalfCircleTop and Image_HalfCircleBottom layers.

NoteYou can optimize your images while preserving the bright colors of your watch face in normal mode by simply adding a dark version of your resources in the Always-On tab. This approach can still significantly reduce the OPR while maintaining your color preferences.
Utilize shapes whenever possible
Shapes are vector-based elements in WFS, defined by mathematical properties such as color, size, and position (not pixel data like images).
They are lightweight, scale perfectly without pixelation, and have minimal impact on memory and storage. Additionally, shapes are fully adjustable in WFS, allowing you to easily tweak or animate them directly.
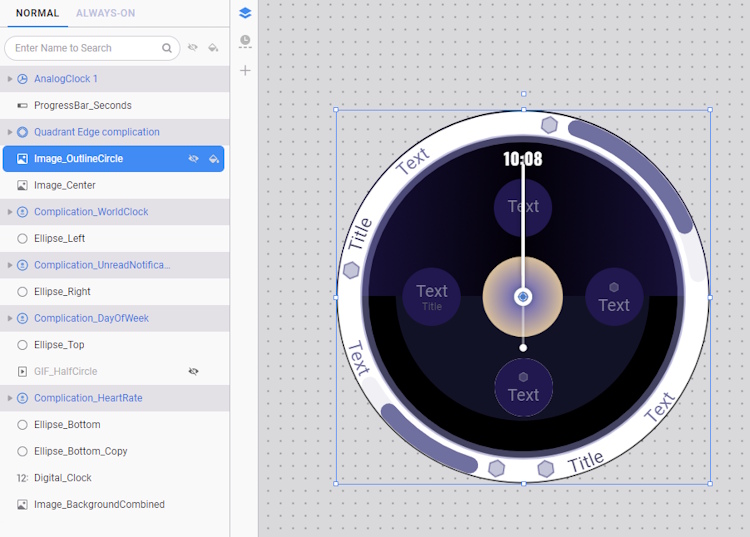
To further optimize the watch face, you can replace simple images in the sample project with shapes:
- Select Image_OutlineCircle. This image is a plain white circle outline, which can be replicated using a shape.
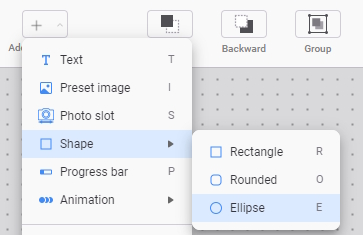
- Go to Add Component > Shape > Ellipse.
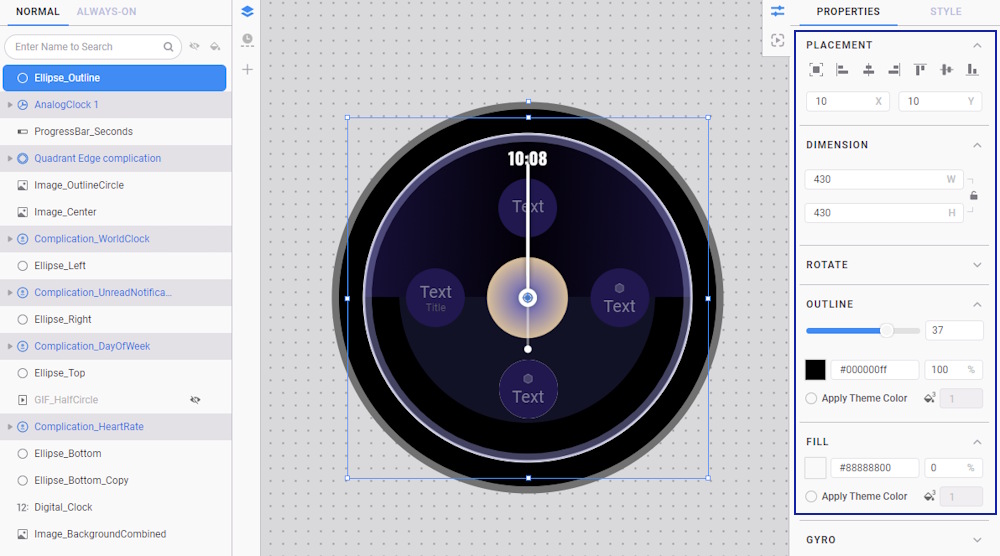
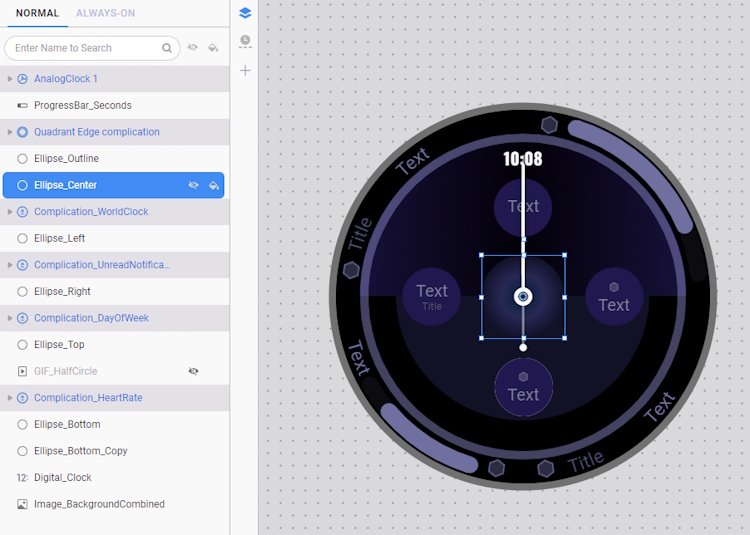
- Rename the ellipse component to Ellipse_Outline and adjust its properties as follows:
- Delete the Image_OutlineCircle layer and drag the Ellipse_Outline layer on top of the Image_Center layer.
- Next, select the Image_Center layer. This is an imported gradient image that consumes a significant amount of memory.
- To improve the efficiency of the design, you can replace it with a shape filled with gradients. Add a component by selecting Shapes > Ellipse.
- Rename the newly added shape component to Ellipse_Center.
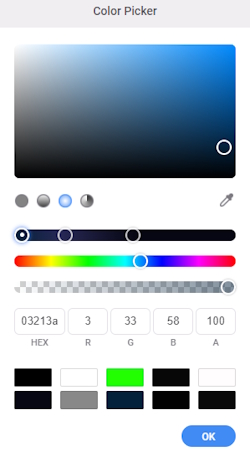
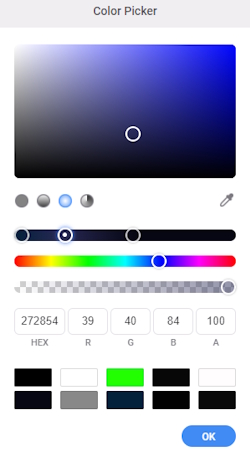
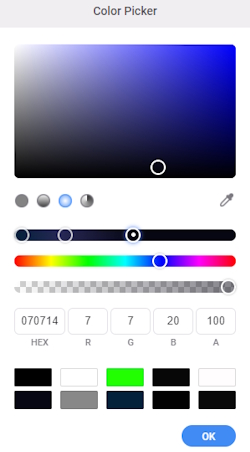
- Open the Fill color properties of Ellipse_Center.
- There are three available gradient types: linear, radial, and angular. Choose radial and adjust the color stops and colors as follows:
- Drag the Ellipse_Center layer above the Image_Center layer.
- Then, delete the Image_Center layer.
- Unhide the GIF_HalfCircle layer and rerun Diagnosis and AOD Analyzer to see how much the watch face has improved.


Limit constantly updating complications and components
Having too many complications and components, especially those that update every second, can impact the overall performance and efficiency of a watch face. When multiple components update simultaneously, the watch performs more background tasks to keep everything current. This can lead to higher power consumption, increased memory usage, and slower interface responsiveness.
To ensure a smooth, energy-efficient, and visually clear user experience, it is generally advisable to keep the number of complications below eight and remove any unnecessary components.
- Temporarily hide the GIF_HalfCircle again.
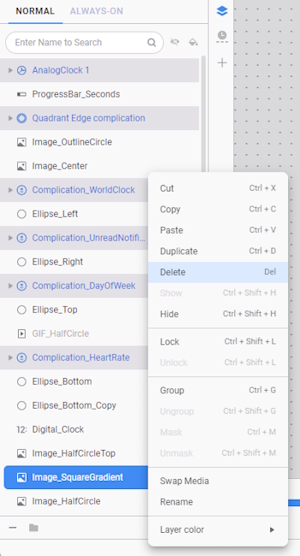
- Select Complication_WordClock, Complication_UnreadNotification, and Complication_DayOfWeek, along with their background components Ellipse_Left, Ellipse_Right, and Ellipse_Top.
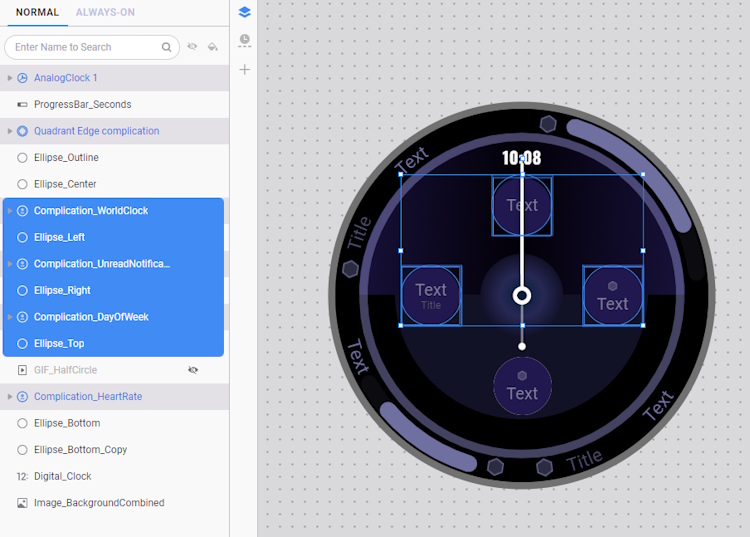
- Right-click on these layers and choose Delete. It is still possible for users to customize and set these complications in any Quadrant Edge complication slot, as these complications are designed to be editable directly on the device.
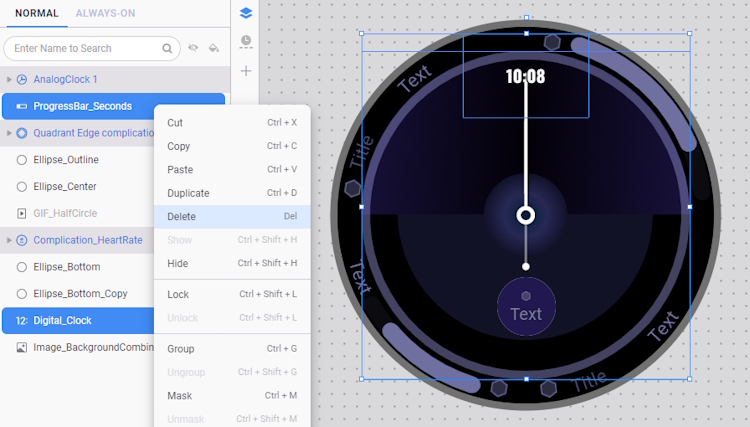
- Delete the ProgressBar_Seconds and Digital_Clock. Unnecessary components that serve a similar purpose as other existing components, such as AnalogClock 1, can be removed to streamline the design and improve efficiency.
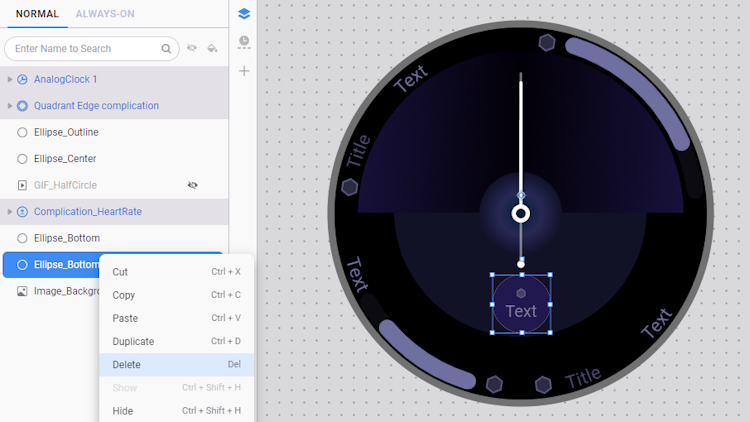
- Next, delete the Ellipse_Bottom_Copy layer. Instead of hiding components using a tag expression, it is more effective to delete them, as components hidden in this manner are still partially rendered and can impact performance.
Improve animated components
Animation can greatly enhance the overall aesthetic of a watch face when done thoughtfully. Smooth and well-timed animations can make the design feel more dynamic, premium, and engaging, adding a sense of liveliness that static designs often lack.
When incorporating animations, it's essential to use them purposefully. For example, in the sample project, the component Ellipse_Bottom is set to blink every second. While this adds visual interest, it also updates continuously, requiring the watch face to refresh each second. This can lead to higher battery consumption without necessarily enhancing the user experience.
To optimize this, consider adding specific conditions for when the animation should occur:
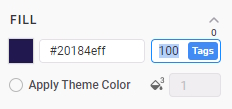
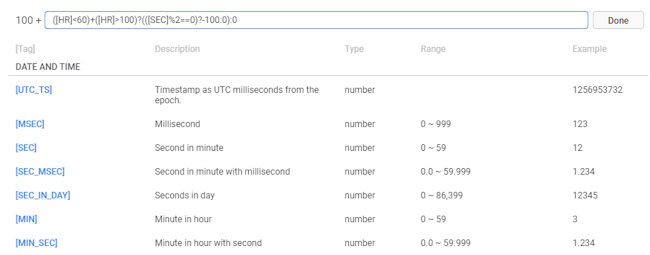
- In the Ellipse_Bottom fill opacity property, click on Tags and change the tag expression to blink only every second when the heart rate is not normal (i.e., less than 60 or greater than 100):
([HR]<60)+([HR]>100)?(([SEC]%2==0)?-100:0):0.
- Unhide GIF_HalfCircle. This component is a half-circle with a wipe animation that reveals the components underneath when the watch face is turned on. It is a GIF file. While this file type is supported by WFS, it is still recommended to import WebP animations, as they are smaller in file size, lighter to render, offer better image quality, and consume less power.
- You can add the WebP file from the optimized resources folder by going to Add Component > Animation > Animated GIF/WebP.
- Add the WebP_HalfCircle and position it as shown below:
- Drag the WebP_HalfCircle layer below the Ellipse_Center layer and delete the GIF_HalfCircle layer.
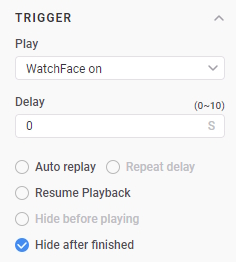
- Set the Trigger property:
NoteIf possible, consider using tag expressions to animate your components. This approach allows you to achieve visually appealing effects without putting unnecessary strain on the watch's memory and battery. Additionally, components with similar purposes, such as the hour hand and its shadow, should be grouped together, and a tag expression should be applied to the group for cohesive animation.
Check the memory usage of the optimized watch face and rerun the AOD Analyzer
- Run the Diagnosis and AOD Analyzer to see how much the watch face improved:
- You can reduce the OPR further by hiding layers in Always-On tab, as shown below:
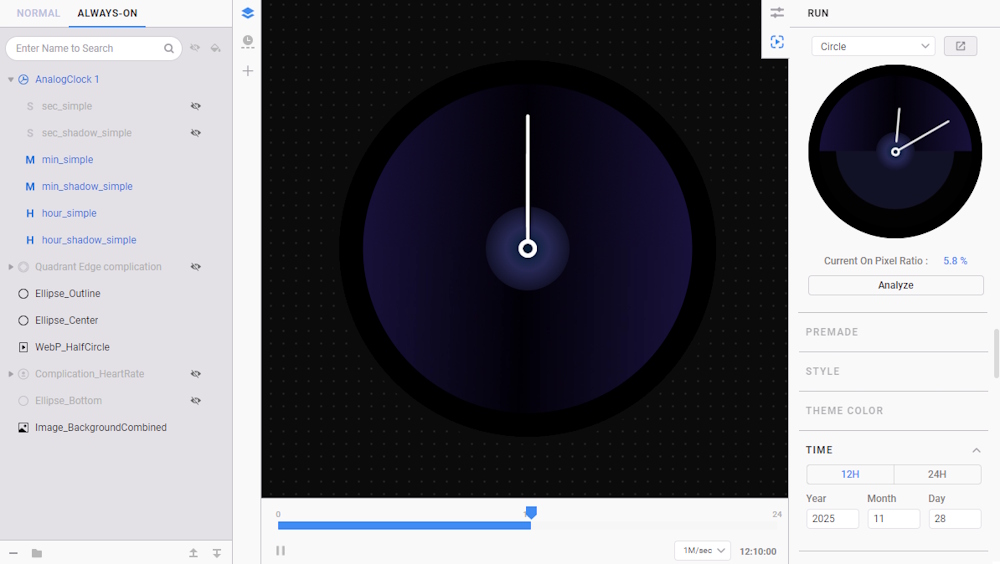
NoteSince the second hand components (sec_simple and sec_shadow_simple) does not update in AOD, it is recommended to hide it.
Test the watch face
To test your watch face on a smartwatch, you need to:
- Connect your watch to the same network as your computer.
- In Watch Face Studio, select Run on Device.
- Select the connected watch you want to test with.
- If your watch is not detected automatically, click Scan devices to detect your device or enter its IP address manually by clicking the + button.
- The watch face launches upon successful installation.

You're done!
Congratulations! You have successfully achieved the goal of this Code Lab. Now, you can optimize a watch face using Watch Face Studio! If you’re having trouble, you may download this file:
Optimize Watch Face Complete Project (418.1 KB)
To learn more, explore Watch Face Studio.