2.2 Steps for Successful Partner Onboarding

The onboarding involves becoming a registered partner, gaining access to development tools (SDKs and APIs), and configuring payment-related services for in-app, web, or push provisioning functionalities.

Below are the recommended and supported steps for successful onboarding:

  1. Become a Member (Samsung Developers Account)

    • Go to Samsung Developers.
    • Sign up for a Samsung Account (if you don’t have one).
    • Accept the terms and conditions required to join the Samsung Developers program.
    • If you have a Samsung Account, click LOG IN. Otherwise, click SIGN UP.
    • Use a company email for account creation—preferably one that’s stable over time (e.g., dev@company.com).
    • Accept the terms and privacy policy.
    • Complete the signup form and verify your email via an activation link.
    • Submit your business or organization information:
      • Company name
      • Contact details
      • Type of service (bank, merchant, fintech, etc.)
    • This step allows Samsung to validate and approve you as a potential partner.
    • After signing in, begin the membership registration process.
      Choose:
      • "I am the first Samsung Pay member of my company" — if you're the first registrant.
      • "My Company is already registered" — if joining an existing partner (enter Partner ID).
    • Fill in company details: name, type of business, location, size.
    • Add user details: contact person, phone number, job title.
    • Submit and wait for Samsung to review your profile.
    • Once approved, you’ll receive full access to restricted tools and documents.

    • Upon review of the information provided, your Samsung Pay relationship manager (RM) may request additional details. Once your membership registration is approved, you'll be granted access to currently restricted areas of the Samsung Pay Portal and you can invite members of your team to collaborate on your Samsung Pay projects. Until then, take advantage of valuable resources like the Samsung Pay SDK and SDK Programming Guide from the following link:
    • Android SDK [In-App Payment and Push Provisioning]: https://developer.samsung.com/pay/native/sdk-overview.html
    • Web Checkout SDK: https://developer.samsung.com/pay/web/overview.html
    • W3C Mobile Payment: https://developer.samsung.com/internet/android/web-payments-integration-guide.html
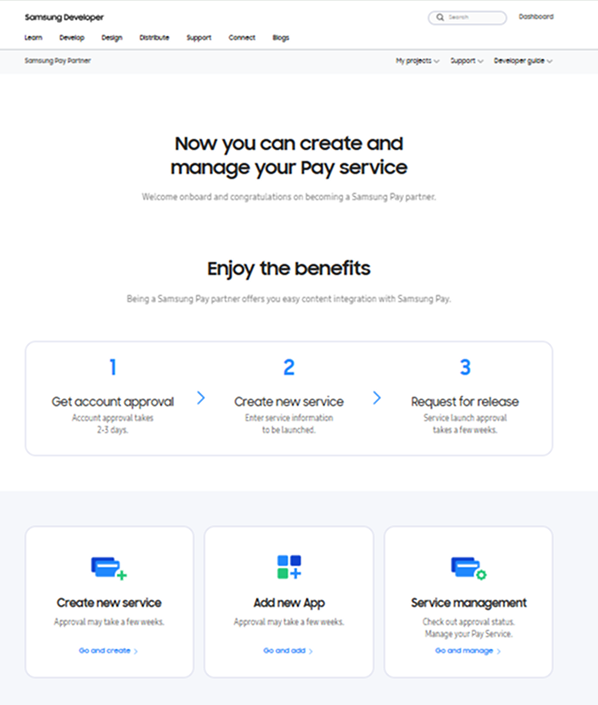
      When you receive the email notifying you of membership approval, you're ready to get started. In your browser, return to the Samsung Pay Portal and SIGN IN.
  2. Set Up Your Partner Project
    Once approved, begin setting up your integration project:

    • Navigate to the "My Projects" section in the partner portal.

    • Create a new project to associate with your app or service integration.

      • App: Your mobile app (Issuer or Merchant app).
      • Service
      • Integration instance linking the app, certificate, and SDK configuration (e.g., card enrollment or web payments).
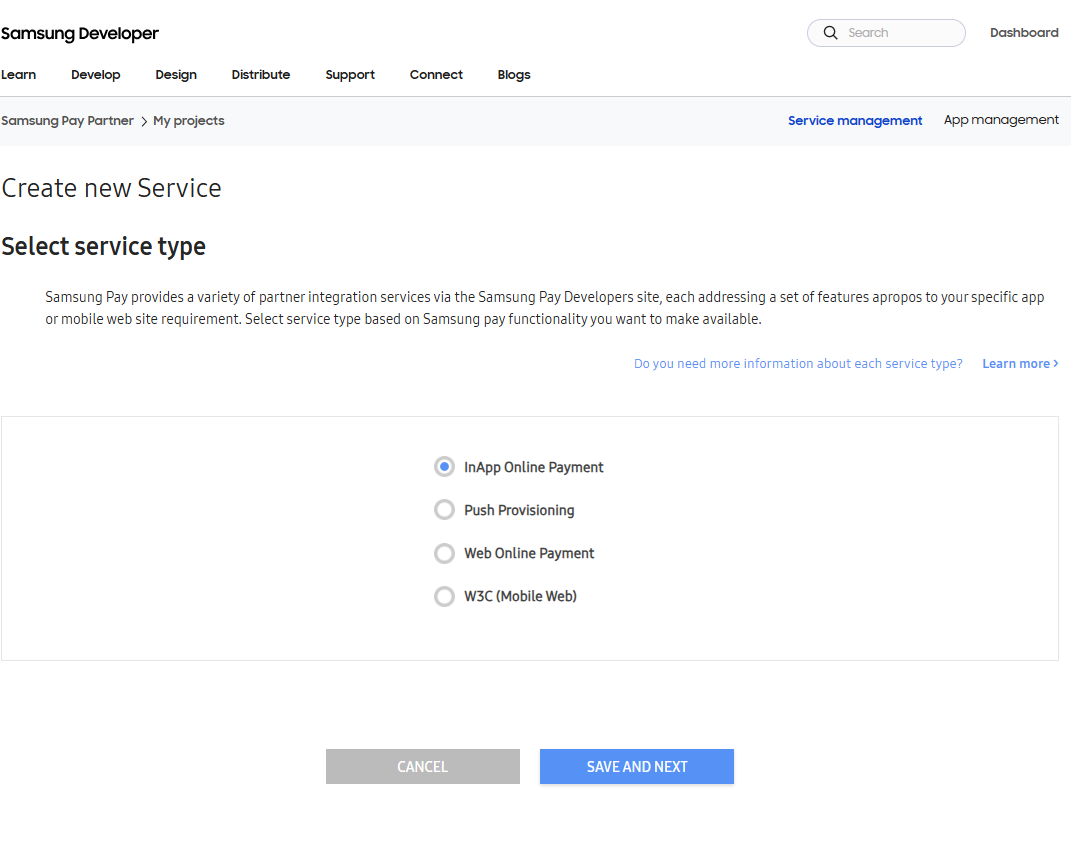
    • Choose your project type based on your intended service:

      • InApp Online Payment
      • Push Provisioning
      • Web Online Payment
      • W3C (Mobile Web)

      You can create different service for the same package for multiple purpose testing.

      For example:

      App deployment scenario

      Unique service-app combinations

      Global issuer app using a different CSR (encryption key) for services in different regions to interact with local servers

      Service 1 = (com.issuer.walletapp, CSR1_US)
      Service 2 = (com.issuer.walletapp, CSR2_PLCC_ABCMart)

      Same issuer app for all customers but different CSRs for managing different card services (B2B vs PLCC)

      Service 1 = (com.issuer.walletapp, CSR1_Regular)
      Service 2 = (com.issuer.walletapp, CSR2_PLCC_ABCMart)

      Multiple merchant apps using the same PG

      Service 1 = (com.merchant.electronicsapp, CSR_PG1)
      Service 2 = (com.merchant.groceryapp, CSR_PG1)

      Global merchant app using a different PG for each country

      Service 1 = (com.merchant.electronicsapp, CSR_PG1)
      Service 2 = (com.merchant.electronicsapp, CSR_PG2)

      Multiple web sites using the same PG

      Service 1 = (electronicssite.merchant.com, CSR_PG1)
      Service 2 = (grocerysite.merchant.com, CRS_PG1)

      Global merchant web site using a different PG for each country

      Service 1 = (electronicsapp.merchant.com, CSR_PG1)
      Service 2 = (electronicsapp.merchant.com, CSR_PG2)

  3. Create New Service
    Samsung Pay supports several types of services.

    • On the Create New Service tile, click Go and create.

    • Select one of the following Service Types:
      • In-App Online Payment Service
      • Push Provisioning
      • Web Online Payment
      • W3C (Mobile Web)