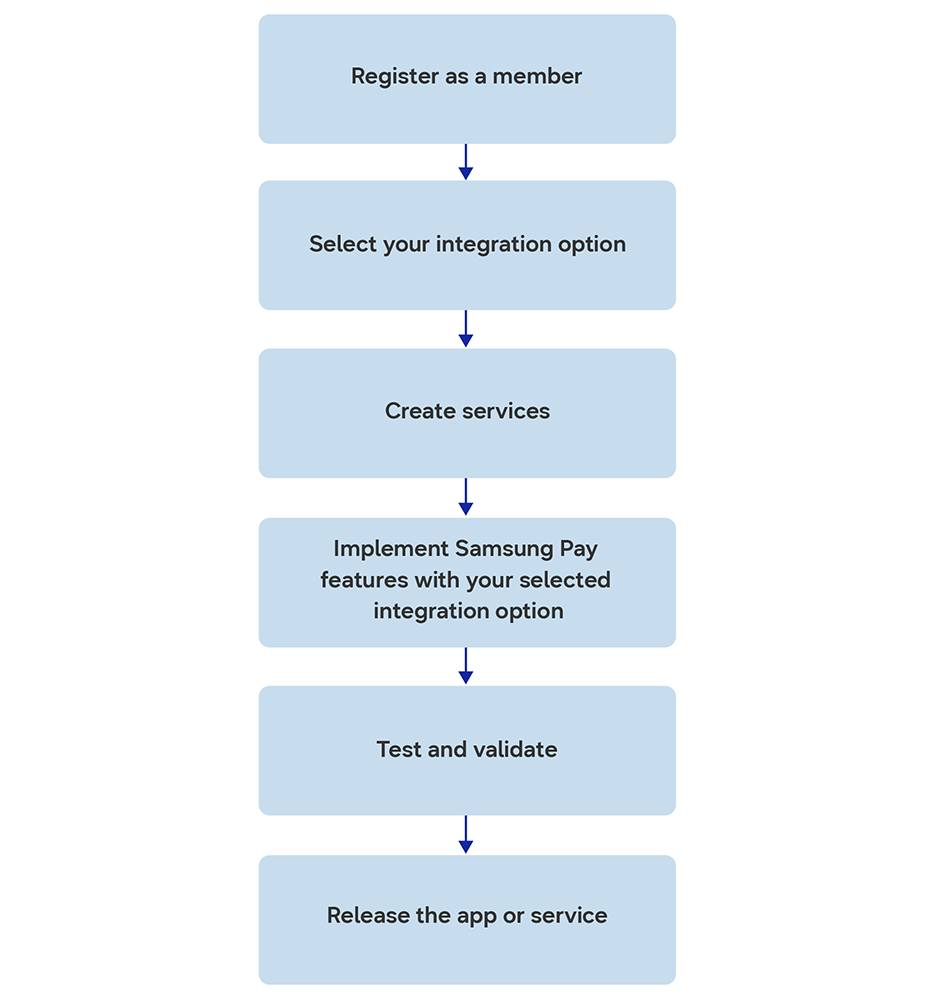
Payment gateways (PG): Create services and add merchants to them through the Samsung Pay Portal or the Merchant Onboarding API.
NoteThe Merchant Onboarding API can only be used with the Web Checkout SDK integration and by PGs. It is recommended for PGs who need to add and manage a large number of merchants.
Implement Samsung Pay features with your selected integration option.
Get Samsung approval and launch your Samsung Pay-integrated app or service for public.
Integration services
To integrate with Samsung Pay, you need a service that consists of the following:
Service type, selected when creating the service
Certificate signing request (CSR)
Service ID, generated by Samsung for your created service
When communicating with Samsung Pay, your app or website passes the service details so that Samsung Pay can verify your partnership status.
The service is bound to your app or website, and only one app or website can be bound with each service ID. However, depending on your CSR or testing requirements, you can deploy a single app or website with multiple services. For example, the usual process is to first create a service in the Staging environment for your app for testing purposes, and when the app is ready for production, to create a separate service (with the same configuration) in the Production environment and release it for live use.
Examples of service-app combinations
App deployment scenario
Unique service-app combinations
Multiple apps using the same payment gateway
Service 1 = (com.merchant.electronicsapp, CSR_PG1) Service 2 = (com.merchant.groceryapp, CSR_PG1)
Global app using a different payment gateway for each country
Service 1 = (com.merchant.electronicsapp, CSR_PG1) Service 2 = (com.merchant.electronicsapp, CSR_PG2)
Multiple websites using the same payment gateway
Service 1 = (electronicssite.merchant.com, CSR_PG1) Service 2 = (grocerysite.merchant.com, CSR_PG1)
Global website using a different payment gateway for each country
Service 1 = (com.merchant.electronicsapp, CSR_PG1) Service 2 = (com.merchant.electronicsapp, CSR_PG2)
A service in the portal has a specific status:
Debugging: When you create a service, this status is used while you test your app.
Requested: After you request a status change (like release approval) for the service, this status shows that Samsung Pay is checking and processing your request.
Blocked: If Samsung Pay cannot approve the status change for any reason, the service gets blocked and you need to modify your app and request approval again. In the meanwhile, the service cannot be used.
Approved: After Samsung approves the service for live production, this status is shown.
Rejected: If a problem is found with a service already in production, this status is shown while you fix the problem and re-release the app. In the meanwhile, the service can still be used.
Manage Your Cookies
We use cookies to improve your experience on our website and to show you relevant
advertising. Manage you settings for our cookies below.
Essential Cookies
These cookies are essential as they enable you to move around the website. This
category cannot be disabled.
Company
Domain
Samsung Electronics
developer.samsung.com, .samsung.com
Analytical/Performance Cookies
These cookies collect information about how you use our website. for example which
pages you visit most often. All information these cookies collect is used to improve
how the website works.
Company
Domain
Samsung Electronics
.samsung.com
Functionality Cookies
These cookies allow our website to remember choices you make (such as your user name, language or the region your are in) and
tailor the website to provide enhanced features and content for you.
Company
Domain
Samsung Electronics
developer.samsung.com, google.account.samsung.com
Preferences Submitted
You have successfully updated your cookie preferences.