This guide explains how to create and manage seller groups.
Introduction to Seller Groups
The TV Seller Office provides functions for managing seller groups. Several accounts can manage applications together by joining into a group.
You can only belong to one group, and groups are also divided into two types of membership. Public Seller group can become Partner Seller group through a partnership request.
There are two roles within a group.
Group manager
The account that creates the group automatically becomes the group manager, and there can be only one manager in the group. Group managers have full control over groups.
Group member
Non-group manager accounts become group members.
Role
Activity
Group manager
Creating a new group
Inviting members into the group
Confirming or rejecting group join requests
Updating group information
Removing members from the group
Transferring the group manager role to one of group members
Moving to another group
Group member
Joining an existing group
Leaving from a group
Group manager and members
Registering applications
Resolving defects reported from Samsung
Asking questions on 1:1 Q&A, and replying to them
Updating seller information
Managing bank account information
Managing TV device information
Accessing the Report menu
Creating Group
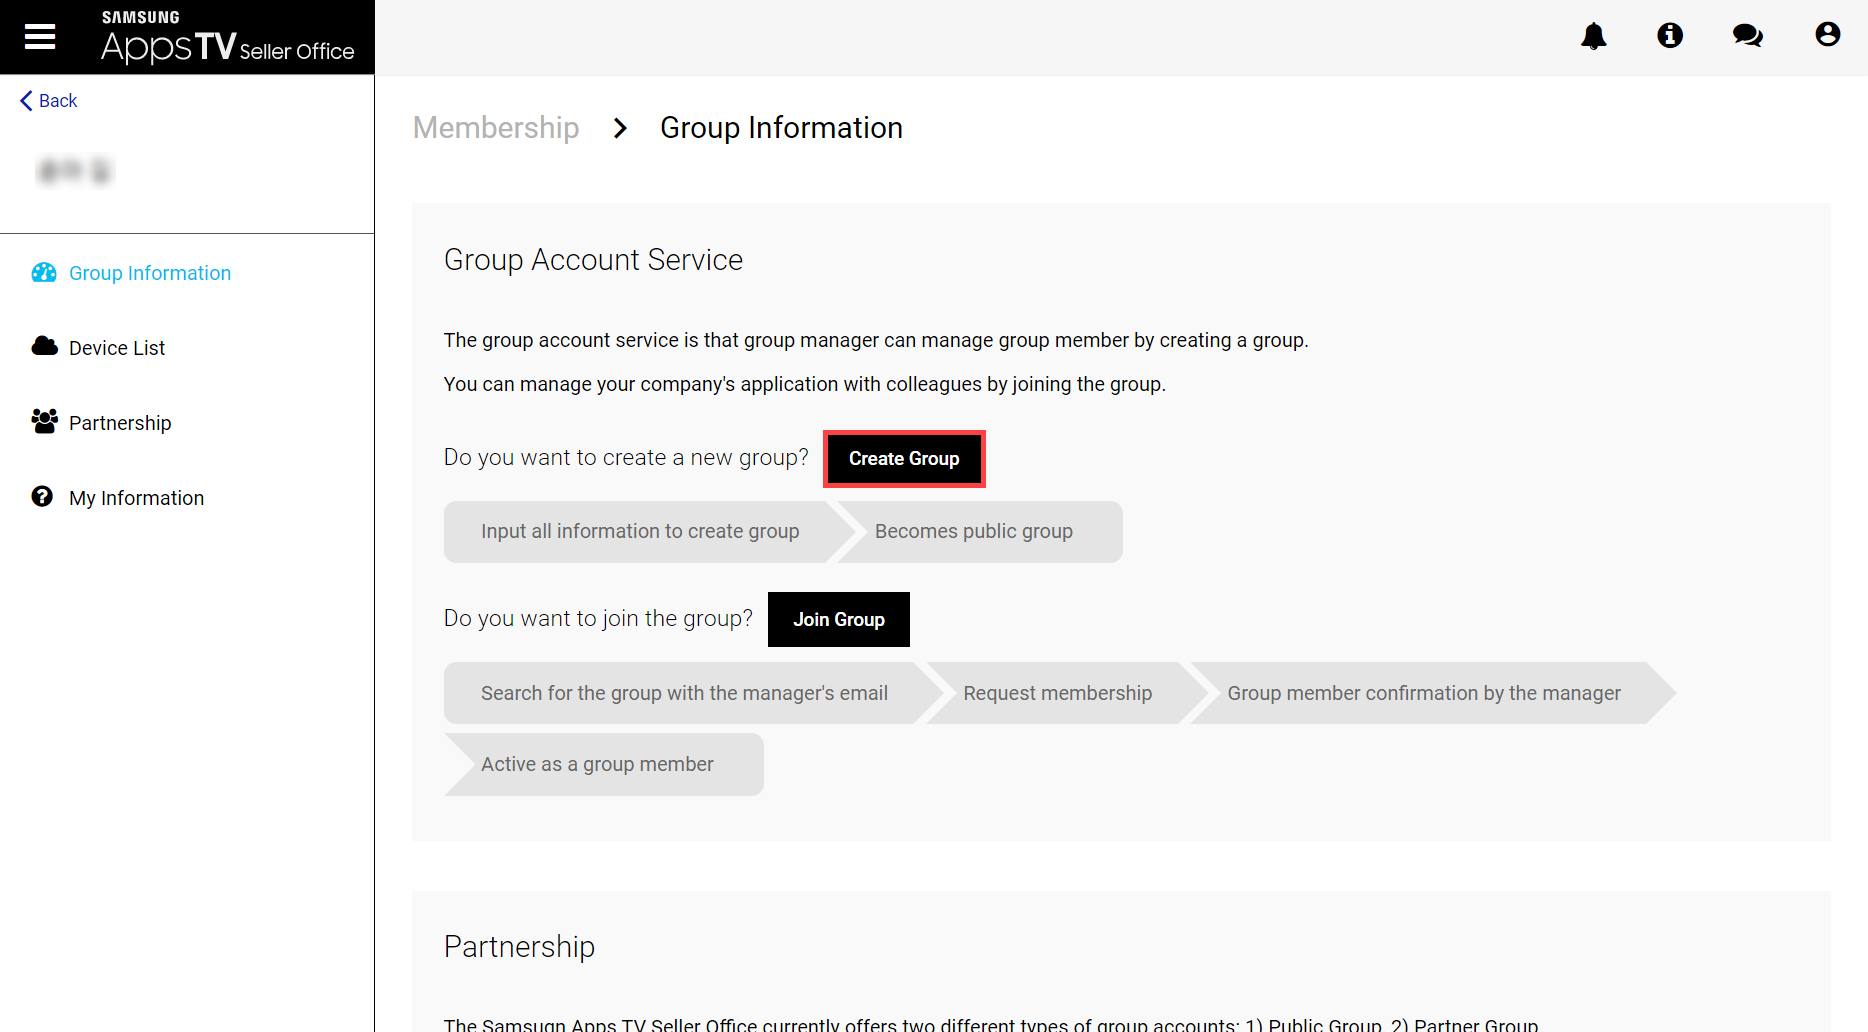
Sellers who are not yet in a group can create a new group.
If you click the "Create Group" button in the "Membership > Group Information" menu, the group creation page is displayed.
Warning
If you already belong to another group, you cannot create a new group.
In order for group members to create a new group, they must leave the current group.
In order for a group manager to create a new group, they must first delegate manager privileges to change to a member role, and then leave the group.
On the Create Group page, fill in the group information and seller information.
Group Information
It is recommended that you enter your company name as the group name. Then enter the country/region information of the group (company).
Input Field
Description
Mandatory
Updatable
Group Name
Enter the same name as your company name. After the group is created, you cannot change its name.
Yes
No
Country or Region
Enter the location of your company. A Samsung Content Manager may be assigned to you based on your location.
Yes
Yes
Account Type
Select your group's account type. You can choose from "Company or Business" or "Individual". If the account type is "Company or Business", you must enter the Registration Number (DUNS, VAT Number, LEI Code, EIN, USt-IdNr, Company Number, SirEN, ABN, ACN, Korean Business Registration Number, etc.) in Seller Information. The application cannot be serviced without the Registration Number. If the account type is "Individual", no registration number is required.
Yes
Yes
Seller Information
In accordance with Korean and European laws, it is necessary to register seller information to launch an application service.
When registering an application, the group's seller information is used by default, but you can change the seller information separately for each application.
Input Field
Description
Mandatory
Updatable
Seller Name
Enter the same name as your company name.
Yes
Yes
Customer Support Email
Enter the customer support email address.
Yes
Yes
Seller Home page
Enter the seller's home page URL.
Yes
Yes
Representative's Name
Enter the representative seller's name.
Yes
Yes
Phone Number
Enter the seller's phone number and country code.
Yes
Yes
Address
Enter the seller's address.
Yes
Yes
Registration Number
Under the Digital Services Act (DSA), if your group's account type is "Company or Business", enter your registration number (DUNS, VAT number, LEI code, EIN, USt-IdNr, Company number, SIREN, ABN, ACN, Korean business registration number, etc.). If the account type is "Individual", no registration number is required.
Yes
Yes
Enter all information and click the "Done" button to create a group.
After creating a group, you automatically become the group's manager.
Joining Existing Group
Sellers who are not yet in a group can join a group that has already been created and become a member of that group.
Warning
If you are already in another group, you cannot join another group.
If a group member wants to join another group, they must leave the current group.
If a group manager wants to join another group, they must first delegate manager authority to change to a member role and then leave the group.
If there are no members to delegate, the group manager can move to another group.
If you receive a group invitation email, you can request to join the group by clicking the invitation link. For more information, see the If you are invited to the group section.
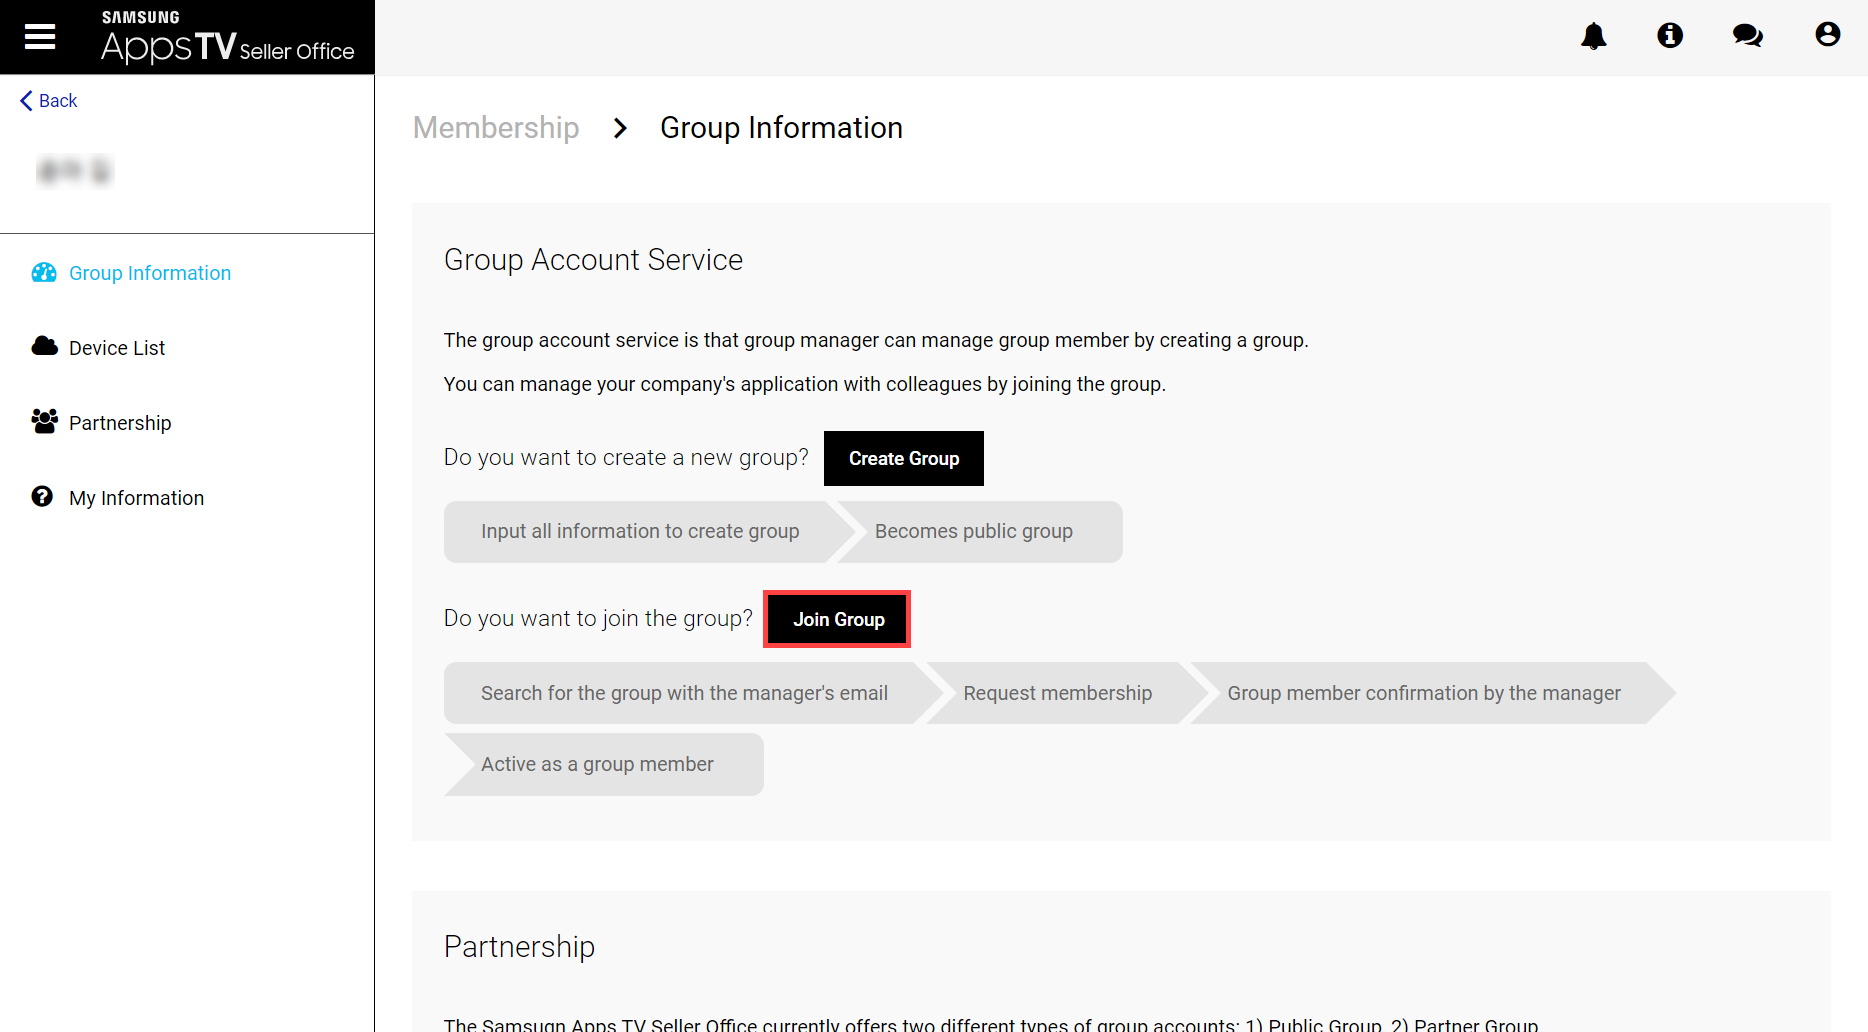
Alternatively, if you know the group manager's ID, you can request to join the group directly by clicking the "Join Group" button on the "Membership > Group Information" menu. For more information, see the If you know the ID of the Group Manager section.
If you are invited to the group
If you receive a group invitation email, you can request to join the group by clicking the invitation link.
Click the Invitation link and log in to the TV Seller Office site.
If you are not a TV Seller Office member, you must first go through the sign-up process.
When the Join Group page appears, check the Group Name to join and click the "Done" button, which will send a request to join the group to the manager.
The group manager confirms the Waiting Member from the "Membership > Members" menu, which completes the invitee's group membership.
If you know the ID of the Group Manager
If you know the group manager's ID, you can request to join the group directly by clicking the "Join Group" button on the "Membership > Group Information" menu.
When the Join Group page appears, enter the group manager's Email ID and click the "Search Group" button to look up the group you want to join.
Check the Group Name that you want to join and click the "Done" button, which will send a request to join the group to the manager.
The group manager confirms the Waiting Member from the "Membership > Members" menu, which completes the invitee's group membership.
What Group Manager Can Do
Group managers have full control over groups. They can invite members to a group, confirm or reject requests to join a group, update group information, removing members from a group, transfer the group administrator role, or move to another group.
Confirming Group Join Request
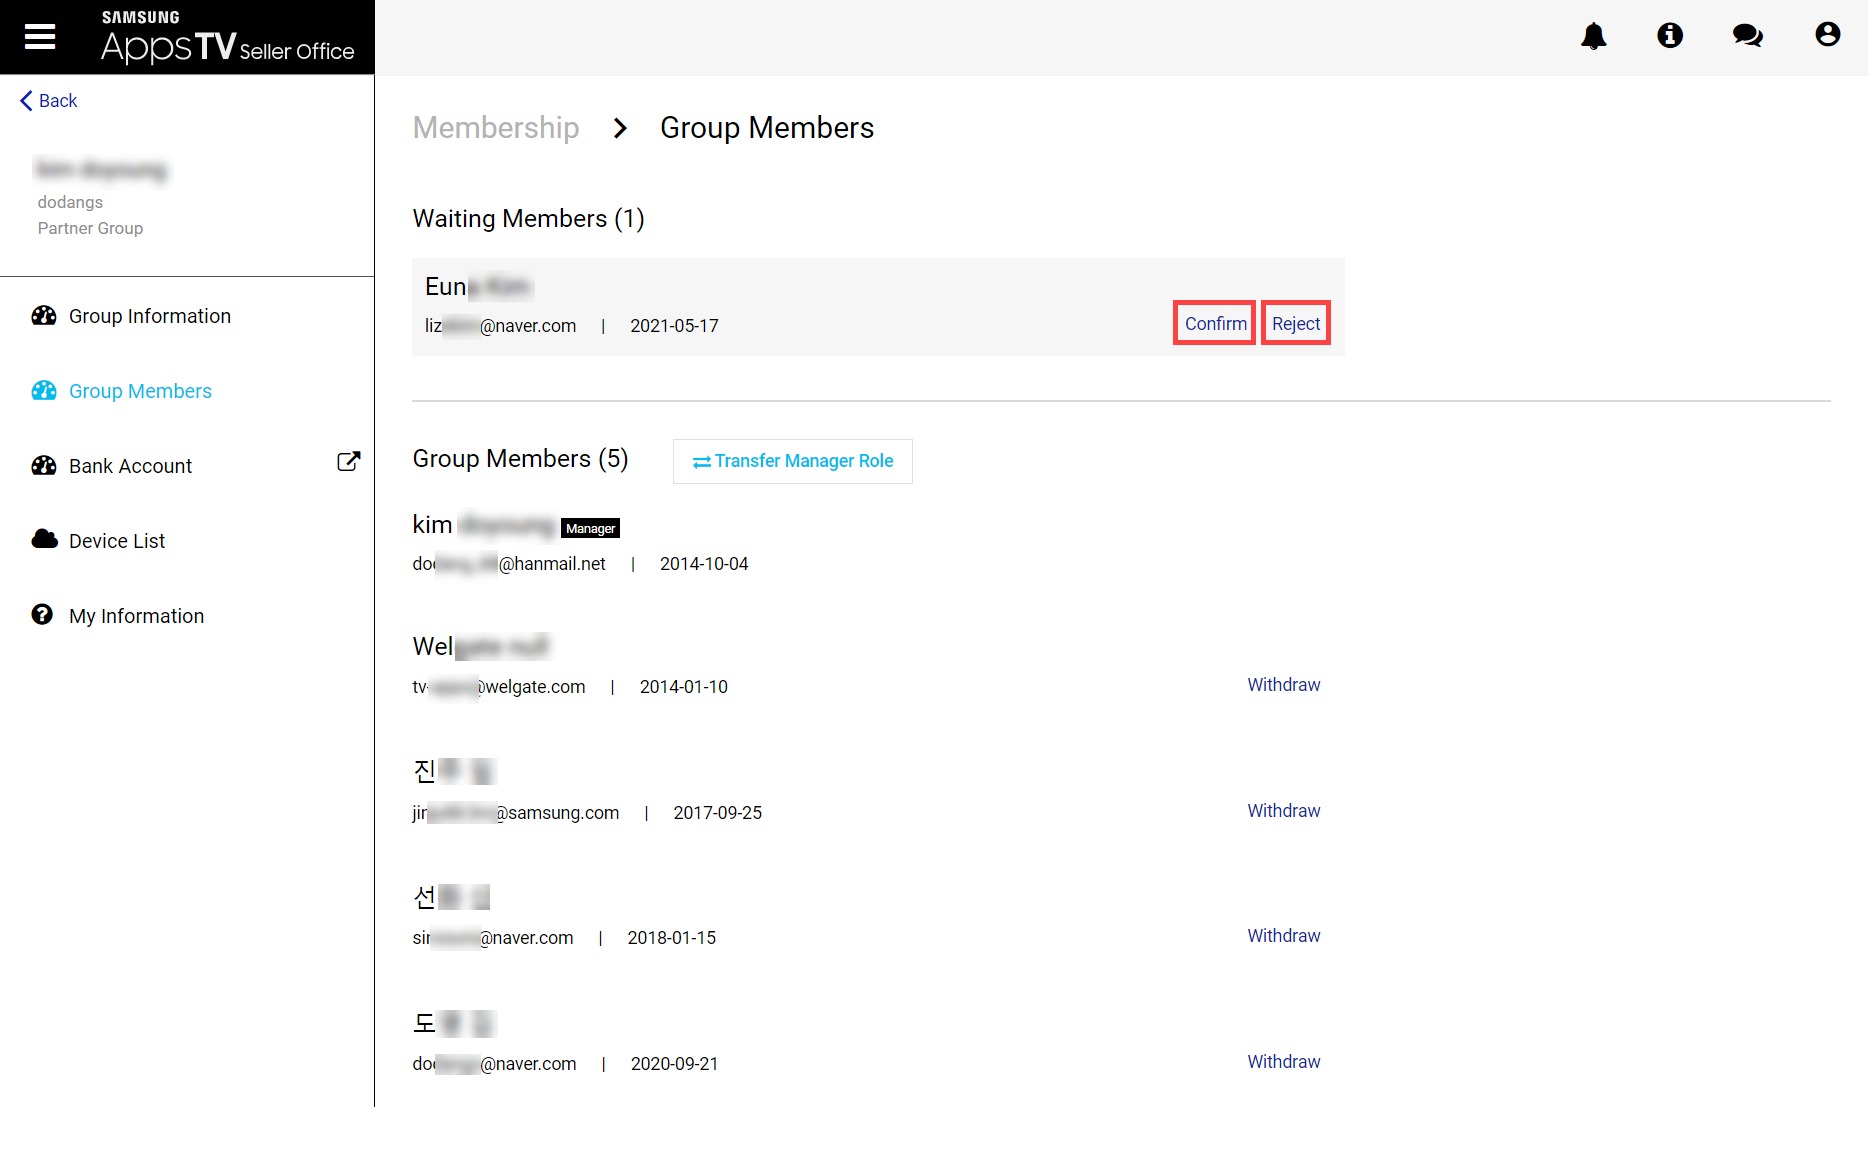
After a seller requests to join the group, the group manager can see the membership request in the "Membership > Group Members" menu, and can accept or reject it.
When the group manager accepts a request by clicking the "Confirm" button, the seller becomes a member of the group and receives a notification email saying "Your request to join the group has been approved".
NoteIf a seller who already owns an application becomes a member of the group, the application becomes owned by the seller group as well as the seller.
If the seller owns the app that is using Samsung Checkout, they will be in Pending state to check the billing information and receive an email notifying you of "Your request to join the group is pending to check the billing information". If billing information is subsequently verified, you will be a member of the group, but if there is a problem, you may be rejected by Samsung Checkout.
If the group manager rejects a request by clicking the "Reject" button, the seller is sent a notification email saying "Your request to join the group has been rejected" and they are removed from the request history.
Inviting Members to Group
You can send an invitation to other sellers so they can join the group.
When you click the "Invite Member" button in the "Membership > Group Members" menu, a pop-up page for member invitation is displayed. Enter and add the email address of the member to invite and click the "Send" button to send an invitation.
Invited members receive an "Invite you to the group" email and can join the group by clicking the invite link. For more information, see the If you are invited to the group section.
Note
If the invitee is not a member of the TV Seller Office, they need to first sign up and then join the group.
If the invited member has joined another group, they need to first leave their existing group and then join the new group.
Withdrawing Group Members from Group
Group managers have the authority to remove members from groups.
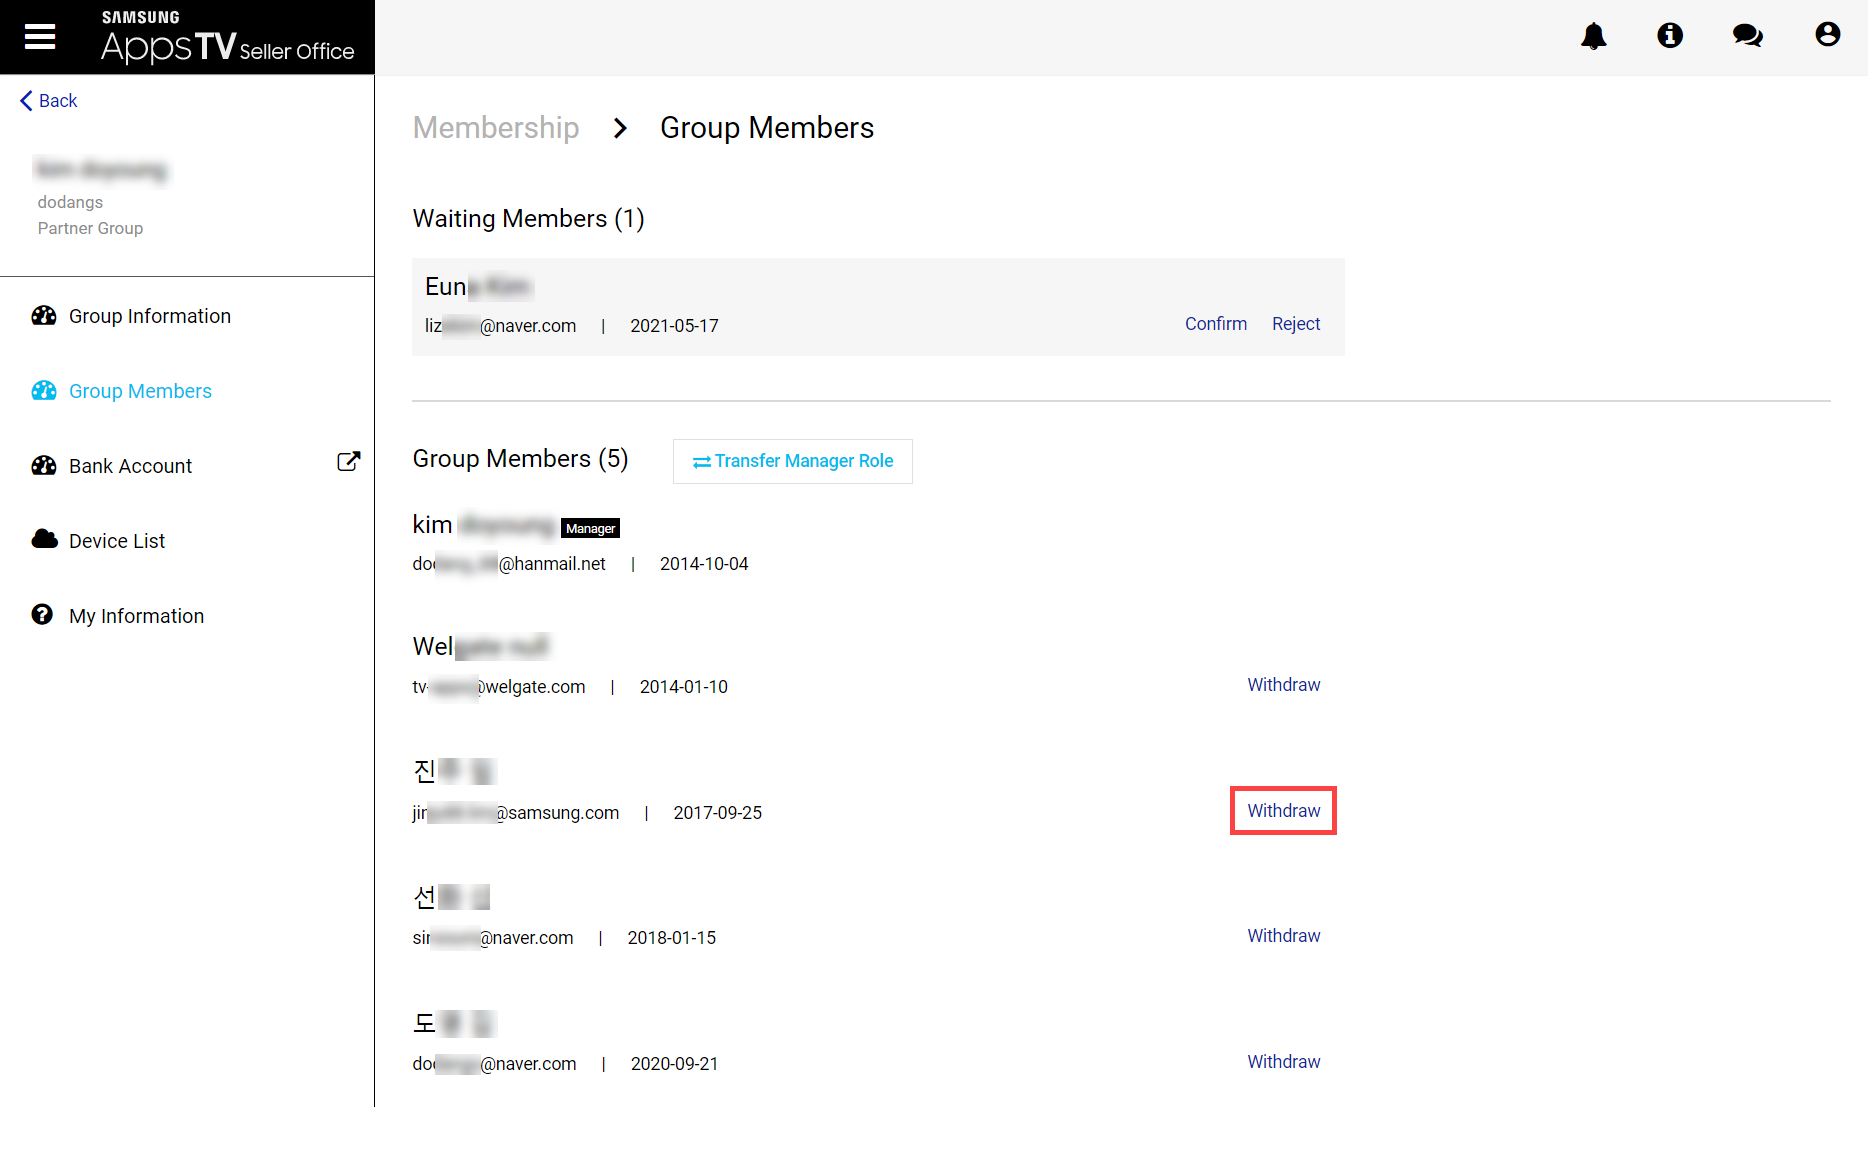
Group managers can view the list of members in the "Membership > Group Members" menu. If the manager clicks the "Withdraw" button for the members to be removed, they are withdrawn from the group after a confirmation.
When the application owner leaves the group, ownership of the application is automatically transferred to the group manager.
WarningThe group manager cannot leave a group. They must delegate manager authority to someone else and become a group member before they can leave. See the Transferring Group Manager Role section for more details on this process.
Members who have left a group can join other groups or create a new group.
Transferring Group Manager Role
After creating a group, you automatically become the manager of the group, and you can delegate manager privileges to other members of the group.
If you click the "Transfer Manager Role" button in the "Membership > Group Members" menu, a pop-up page for transferring manager roles is displayed.
Select a member who will have group manager privileges and click the "Done" button to complete the transfer.
After you transfer the group manager role, your status becomes a member of the group.
NoteIf the manager who has the Samsung Checkout account information transfers authority, the new manager must also register the bank account information.
If the account information is not registered, a notification email saying "Bank Account information is required for settlement of TV Store" is sent to the new manager.
For more information, refer to the Managing Bank Account Information section.
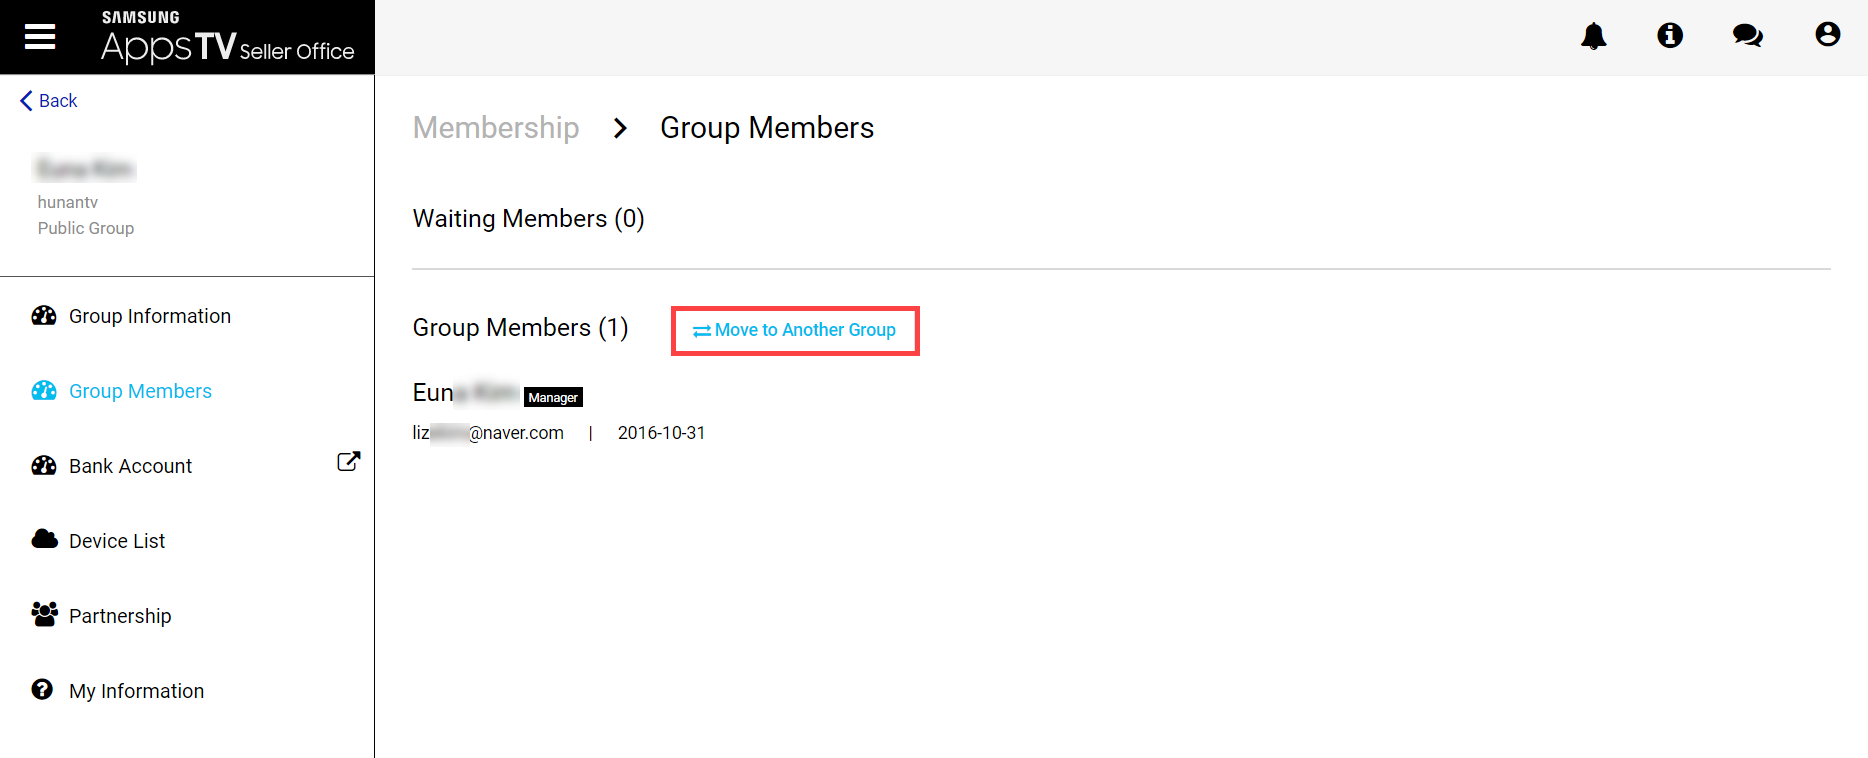
Moving to Another Group
If the group has no members, the group manager can move to another group.
All applications owned by the group are moved together, and the previous group is automatically deleted when the move is complete.
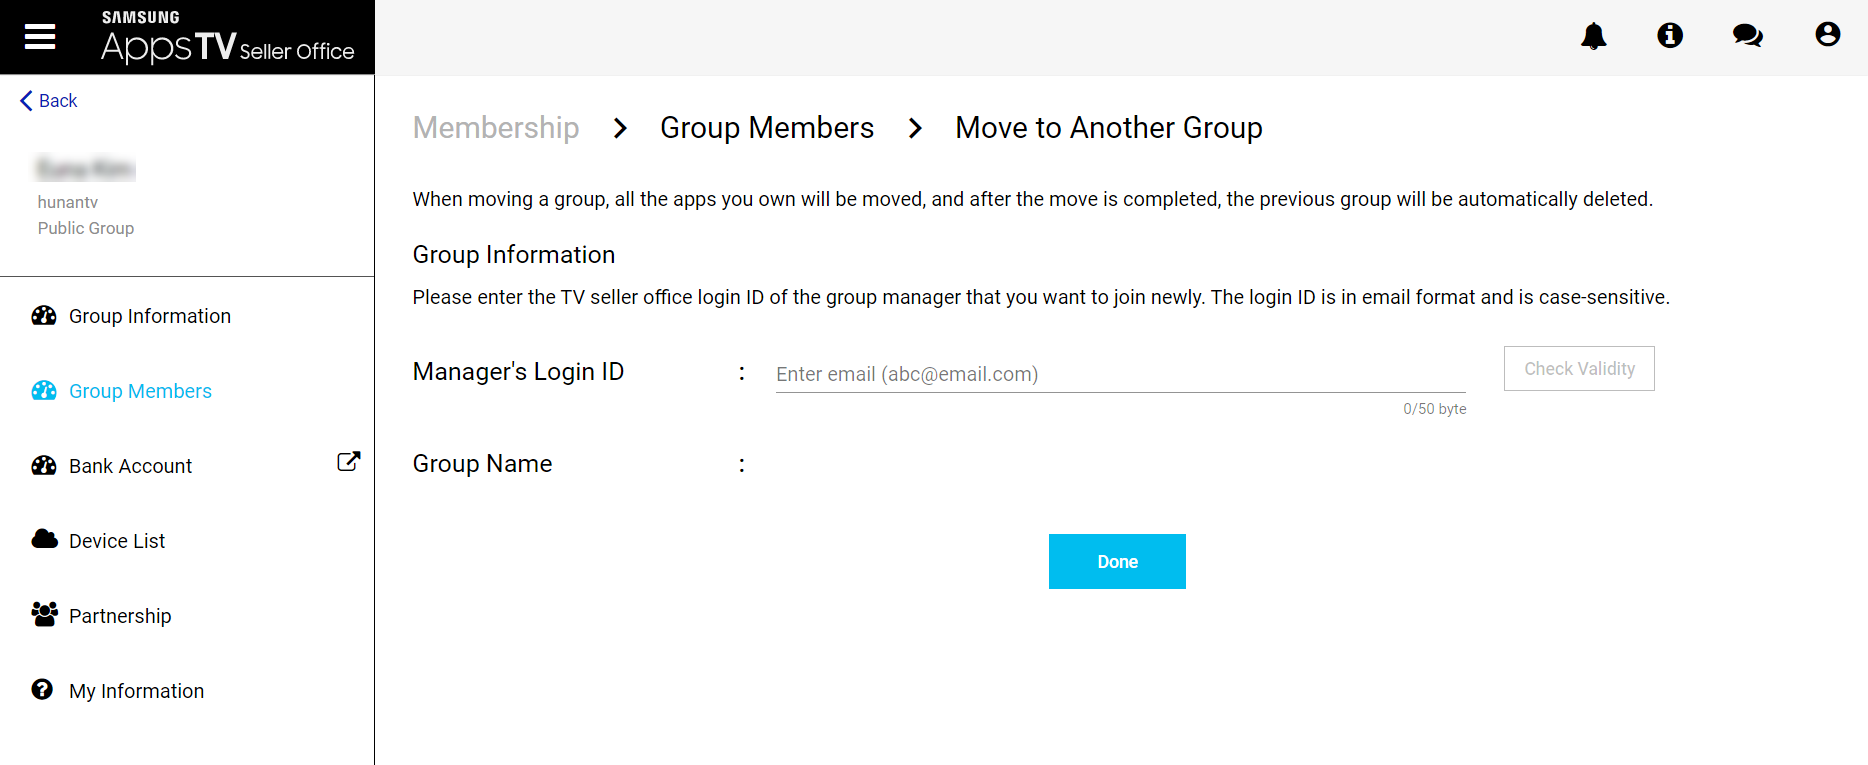
If you click the "Move to Another Group" button in the "Membership > Group Members" menu, the group move page is displayed.
WarningIf you have an app checking the billing information from Samsung Checkout, you will not be able to move the group and will be able to do so after the checking is complete.
First, search for the group to move to with the group manager's email address. When the destination group is confirmed, click the "Done" button to send a membership request.
After that, if the group manager approves, the group transfer is completed.
Modifying Group Information
Group managers can edit the group's country/region information in the "Membership > Group Information" menu. The group name cannot be modified.
NoteA Samsung Content Manager may be assigned to a group based on its country/region. The Content Manager is in charge of communicating with the Samsung team during application release or 1:1 Q&A support.
Once the "Save" button is clicked after editing the country/region information, the change is processed immediately.
Seller groups are divided into Public and Partner levels, and a Public Seller group can become a Partner Seller group by requesting a partnership by clicking the "Request Partnership" button.
For more information on partnerships, refer to the Becoming Partners guide.
What Group Manager and Members Can Do Together
Group manager and members can manage application services together. This includes application registration, defect resolution, adding 1:1 Q&A questions and replies, updating seller information, managing bank account information, managing TV device information, checking service reports, and so on.
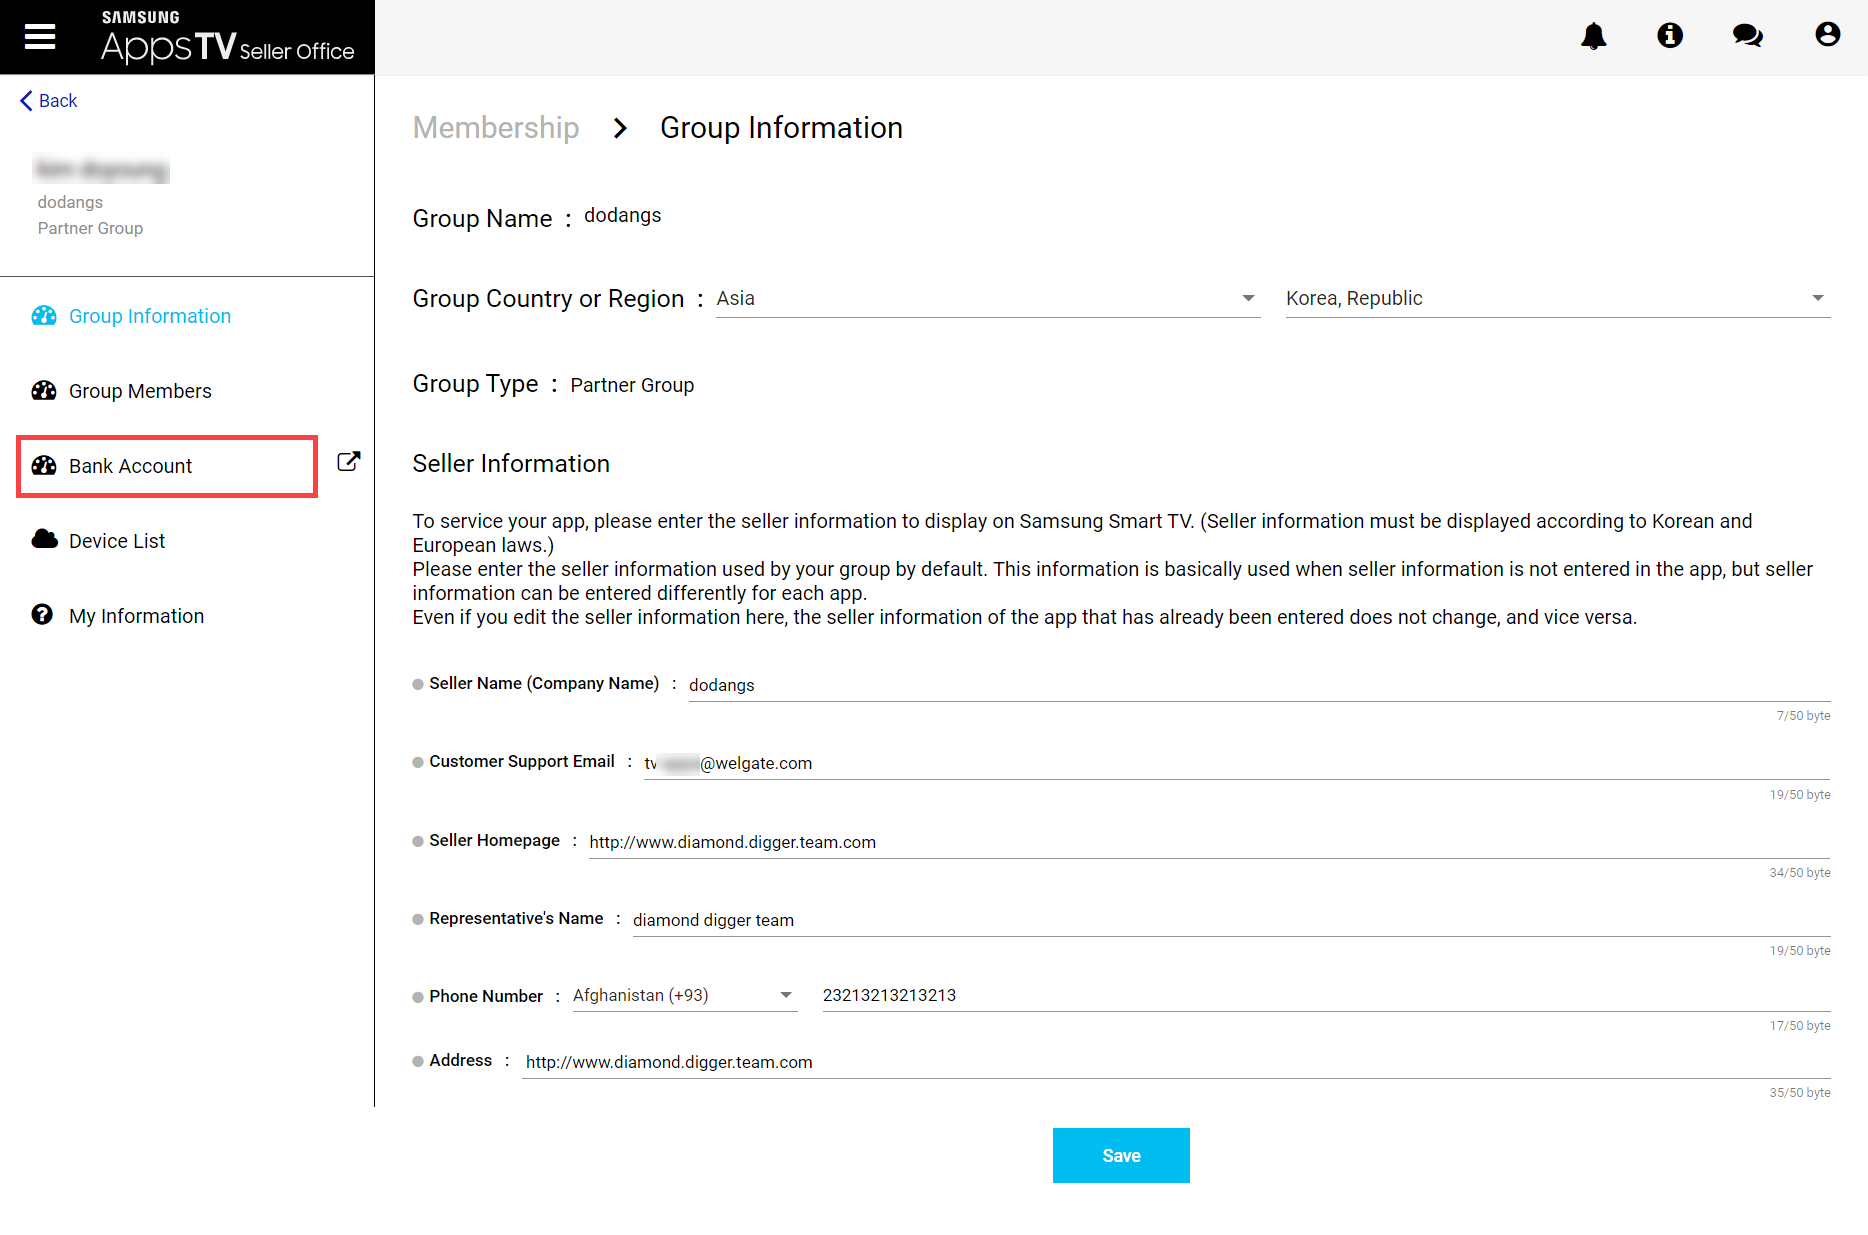
Updating Seller Information
The seller information entered by default when registering the application can be modified in the "Membership > Group Information" menu.
Input Field
Description
Seller Name
Enter the same name as your company name.
Customer Support Email
Enter the customer support email address.
Seller Home page
Enter the seller's home page URL.
Representative's Name
Enter the representative seller's name.
Phone Number
Enter the seller's phone number and country code.
Address
Enter the seller's address.
Registration Number
Under the Digital Services Act (DSA), if your group's account type is "Company or Business", enter your registration number (DUNS, VAT number, LEI code, EIN, USt-IdNr, Company number, SIREN, ABN, ACN, Korean business registration number, etc.). If the account type is "Individual", no registration number is required.
NoteYou can change the account type if necessary.
Modify the required information and click "Save" to change it immediately.
NoteEven if the group information's seller information changes, the application's seller information does not change accordingly, and vice versa.
To change the seller information displayed on TV, you need to edit the seller information in the application, not the seller information in the group information.
For more information, refer to the Entering Service Information section of the Entering Application Information guide.
Managing Bank Account Information
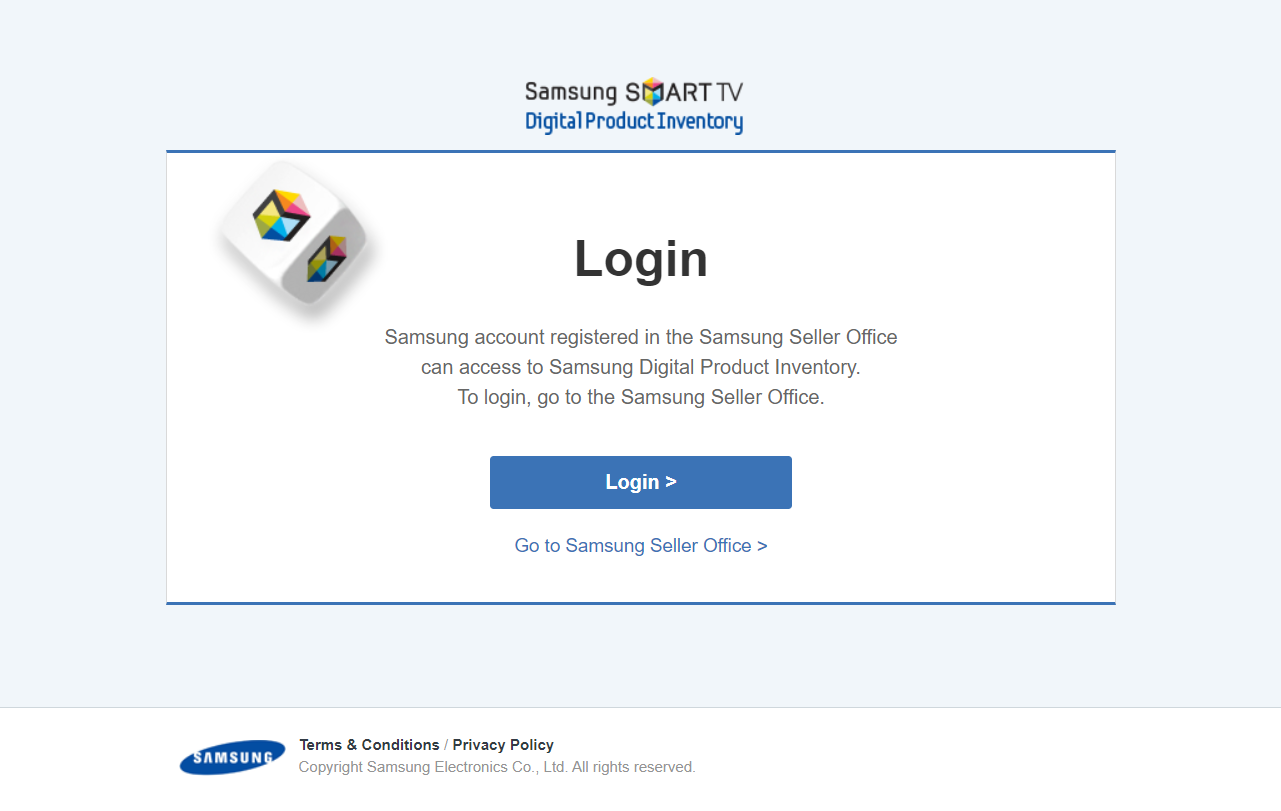
To register an application that uses the 'Samsung Checkout' feature, bank account information to be settled must be registered in the Samsung Checkout DPI system.
Note
Samsung Checkout DPI checks whether bank account information is registered in the application information every time a transaction occurs in the application.
You can access the Samsung Checkout DPI system to register products and check the transaction list.
When you click the "Membership > Bank Account" menu, the Samsung Checkout DPI system's settlement account information management page is displayed as a pop-up.
The items you need to enter are as follows:
Category
Input Field
Description
Updatable
Basic Information
CP ID
This field auto-fills.
No
GUID
This field auto-fills.
No
Nationality
This can affect the tax calculation. Make sure the information you enter is correct.
No
CP Type
This field has a fixed value of 'Incorporate'.
No
CP Name
This field auto-fills.
No
Company Name
Enter your company's name.
No
Corporate Registration Number
Enter your company's Corporate Registration Number.
No
Company Address
City, state/province/region, zip/postal code.
Yes
Detail Address
Street address, apartment, building, floor, and so on.
Yes
Cell Phone Number
Enter your cell phone number.
Yes
Partner Type
This field has a fixed value of 'Partner'
No
Email Address
Samsung will send the monthly sales report to this email address. Make sure the information you enter is correct.
Yes
Bank Account Information
Bank Account
This field has a fixed value of 'BANK'.
No
Bank Nationality
Choose the bank account's country code.
Yes
Bank Depositor
Enter the name of depositor (account holder).
Yes
Bank Account Number
Enter the bank account number.
No
Bank Name
Enter the bank name.
Yes
Bank Branch
Enter the bank branch information.
Yes
Bank Address
Enter the bank address.
Yes
Bank Identification Code
Enter the bank identification code such as IBAN or SWIFT code. This field is encrypted.
No
CP R/S Rate (%)
This field has a default rate of '70'. An alternative revenue share rate may be established upon mutual written agreement during the certification process for an application.
Yes
Minimum Payout Amount
This field has a fixed value of '$500'. Your earned balance at the time of payout must meet this minimum.
No
Tax Information
Name of Representative
This field auto-fills with your name.
No
Tax Bill Reception Email
This field auto-fills with your account. Samsung will send the tax bill to this email address.
No
Registered Smart Bill
This field and the "Check" button only apply to the Korean CP.
Yes
Enter all required information and click "Save" to register it immediately.
You can edit your information at any time after completing your registration.
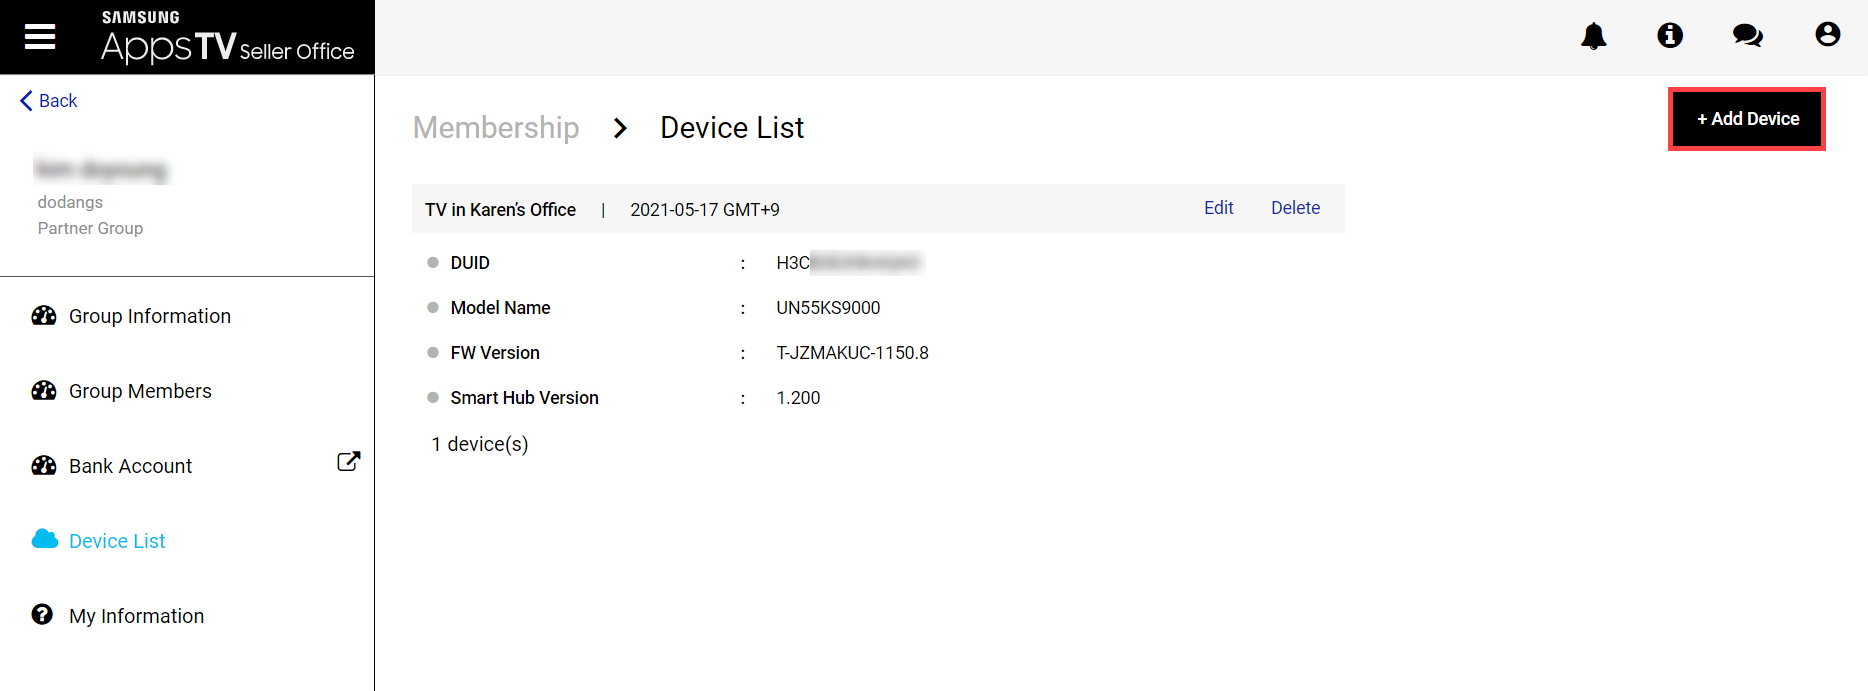
Managing TV Device Information
If you register TV information used during application development in the "Membership > Device List" menu, you can conveniently use it when inquiring about 1:1 Q&A or conducting an alpha test.
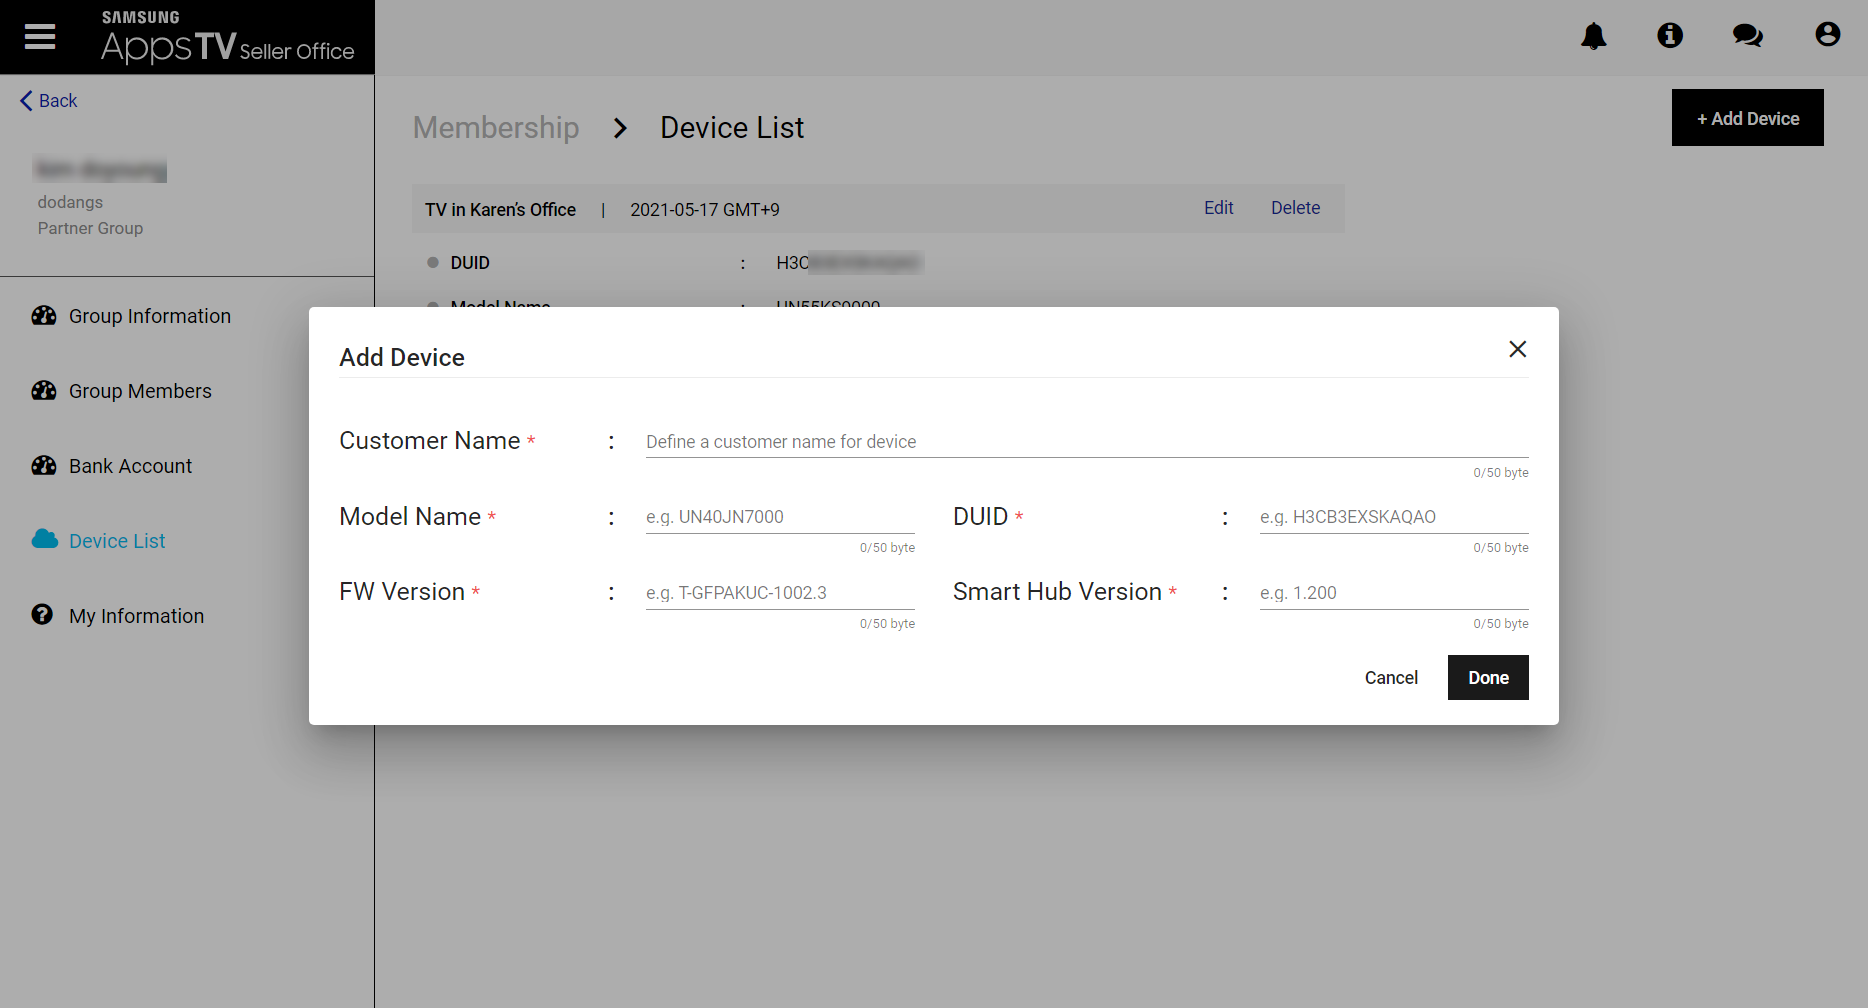
If you click the "Add Device" button, a pop-up for entering new TV information is provided. If you enter all required information and click the "Done" button, it will be added to the TV list.
Information required for TV registration can be obtained through the TV's setup menu.
Input Field
Description
Mandatory
Updatable
Customer Name
Define a customer name for device
Yes
Yes
Model Name
For example, UN55KS9000
Yes
Yes
DUID
For example, H3CB3EXSKAQAO
Yes
Yes
Firmware Version
For example, T-JZMAKUC-1150.8
Yes
Yes
Smart Hub Version
For example, 1.200
No
Yes
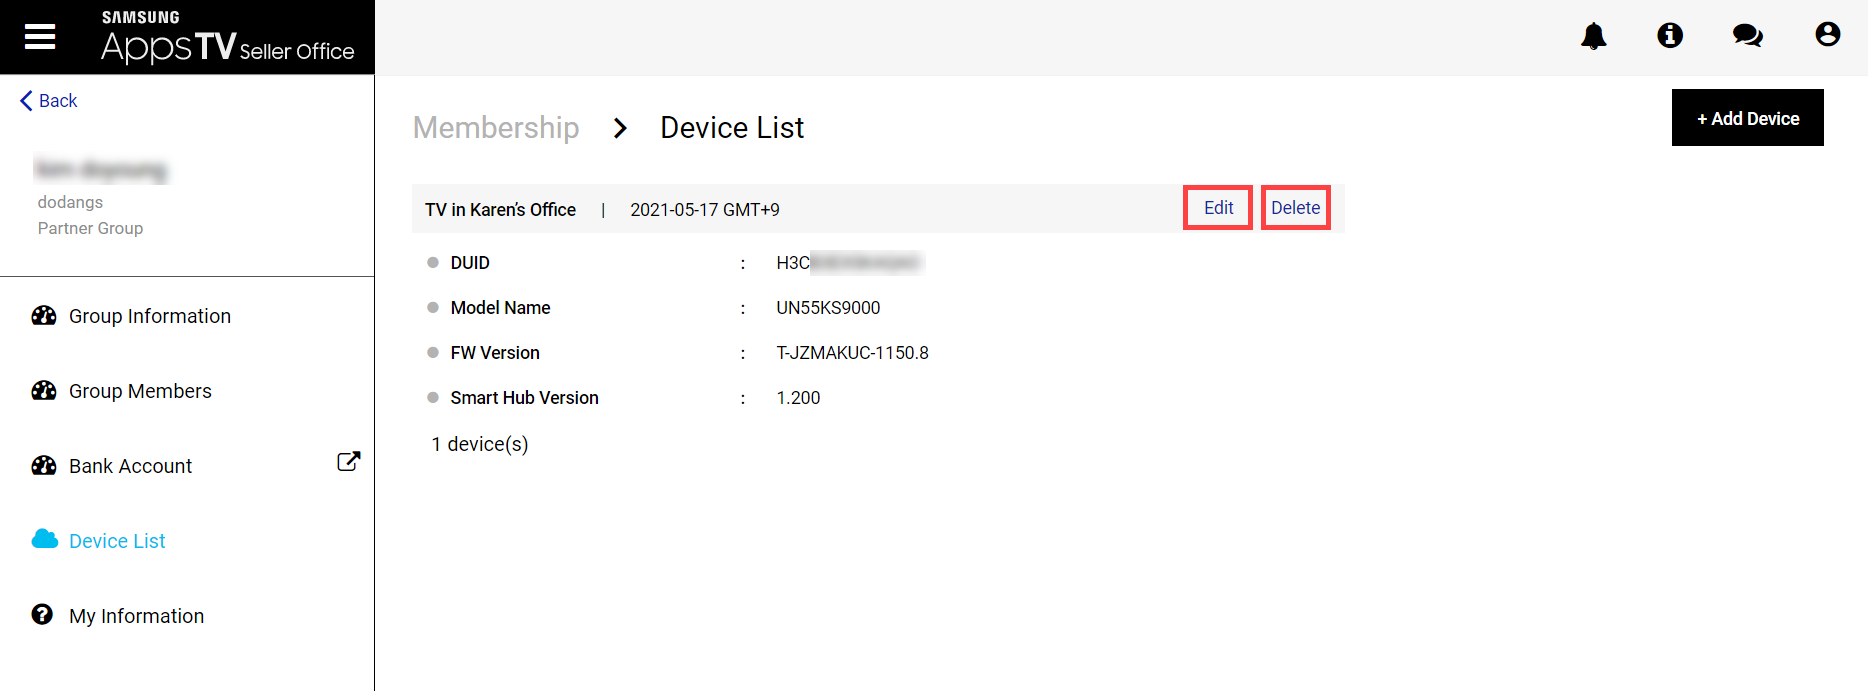
Registered TV information can be modified or deleted at any time.
If you click the "Edit" button, a pop-up to edit the TV information is provided. Modify the required information and click the "Save" button to change it immediately.
Click the "Delete" button to delete the TV information immediately.
What Group Members Can Do
Group members can directly leave the group they belong to.
Leaving Group
In the "Membership > Group Members" menu, if you click the "Withdraw" button for yourself, your withdrawal is processed after a confirmation.
If the owner of an application leaves, ownership of it is automatically transferred to the group manager.
After leaving a group, you can join another group or create a new group.
NoteThe group manager cannot leave a group. They must delegate manager authority to someone else and become a group member before they can leave. See the Transferring Group Manager Role section for more details on this process.
Manage Your Cookies
We use cookies to improve your experience on our website and to show you relevant
advertising. Manage you settings for our cookies below.
Essential Cookies
These cookies are essential as they enable you to move around the website. This
category cannot be disabled.
Company
Domain
Samsung Electronics
developer.samsung.com, .samsung.com
Analytical/Performance Cookies
These cookies collect information about how you use our website. for example which
pages you visit most often. All information these cookies collect is used to improve
how the website works.
Company
Domain
Samsung Electronics
.samsung.com
Functionality Cookies
These cookies allow our website to remember choices you make (such as your user name, language or the region your are in) and
tailor the website to provide enhanced features and content for you.
Company
Domain
Samsung Electronics
developer.samsung.com, google.account.samsung.com
Preferences Submitted
You have successfully updated your cookie preferences.