DISTRIBUTION OF TIZEN-BASED WATCH APPS HAS BEEN DISCONTINUED
Create Your First Tizen Wearable Native Application
Welcome to Tizen wearable native application development!
A wearable native application is created using the C language, and can be run on Tizen wearable devices. The application uses the native API, which provides various interfaces to the device hardware allowing you to take advantage of numerous capabilities tailored to run with limited device resources.
Study the following instructions to help familiarize yourself with the Tizen native application development process as well as using the Tizen Studio and installing the created application on the emulator or target device. With the instructions, you can create and run a basic wearable native application, which displays some text on the screen with no user interaction:
Before you get started with developing Tizen applications, download and install the Tizen Studio.
For more information on the installation process, see the installation guide.
This step shows how you can create the application UI and make small alterations to it to improve the usability of your application.
When you are developing a more complex application, you can take advantage of the native tools included in the Tizen Studio to ease the tasks of creating functionality and designing the application UI.
Creating a Project
The following example shows you how to create and configure a basic wearable native application project in the Tizen Studio. An application project contains all the files that make up an application.
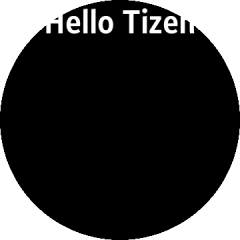
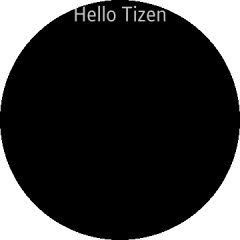
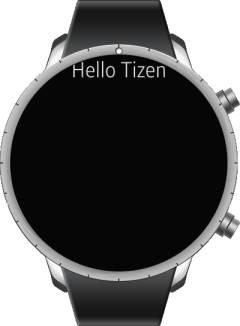
The following figure illustrates the application to be created. The application screen displays the Hello Tizen text and no user interaction is provided. If you click the Back key on the device, the application moves to the background.
Figure: Wearable native Basic UI application
To create the application project:
Launch the Tizen Studio.
In the Tizen Studio menu, select File > New > Tizen Project.
The Project Wizard opens.
In the Project Wizard, define the project details.
The Project Wizard is used to create the basic application skeleton with the required folder structure and mandatory files. You can easily create different applications by selecting an applicable template or sample for the Project Wizard to use.
Select the Template project type and click Next.
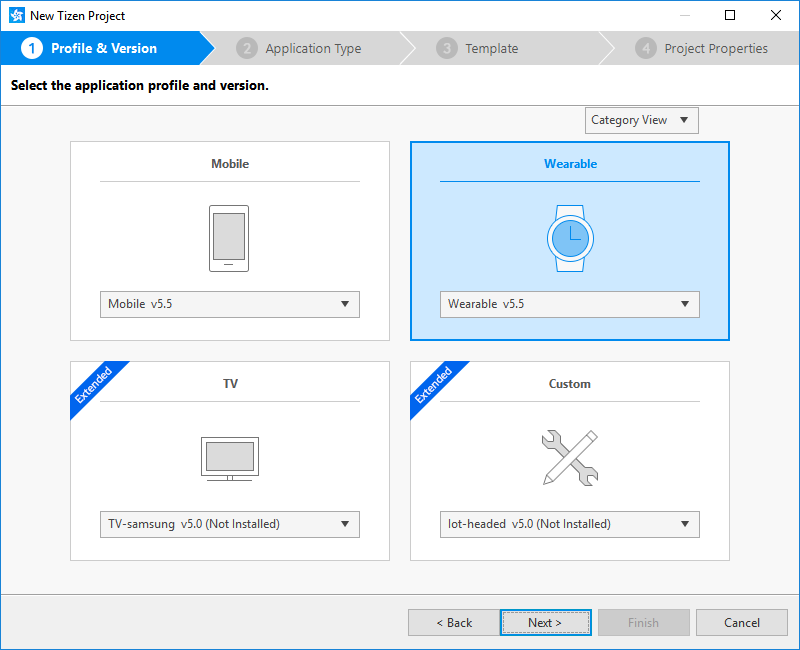
Select the profile (Wearable) and version from a drop-down list and click Next.
The version depends on the platform version you have installed and with which you are developing the application.
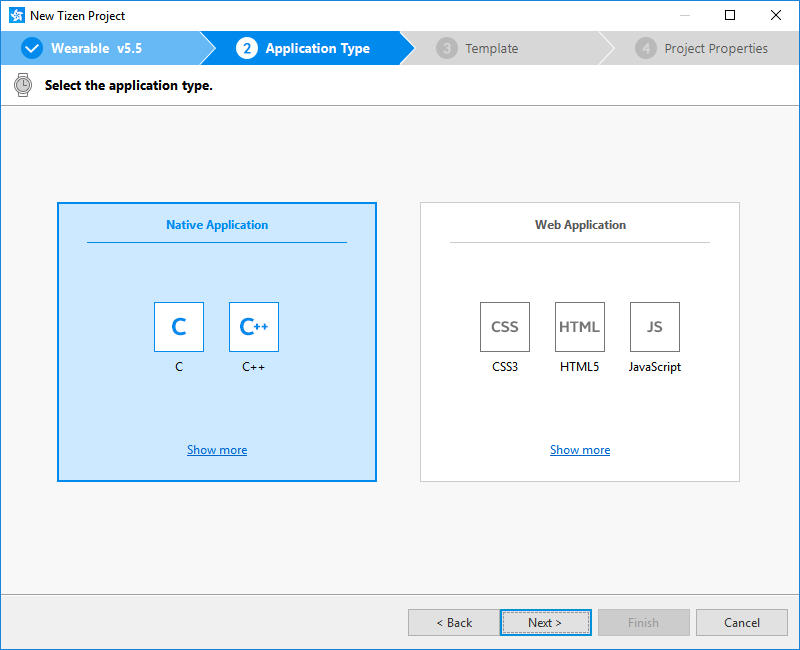
Select the Native Application application type and click Next.
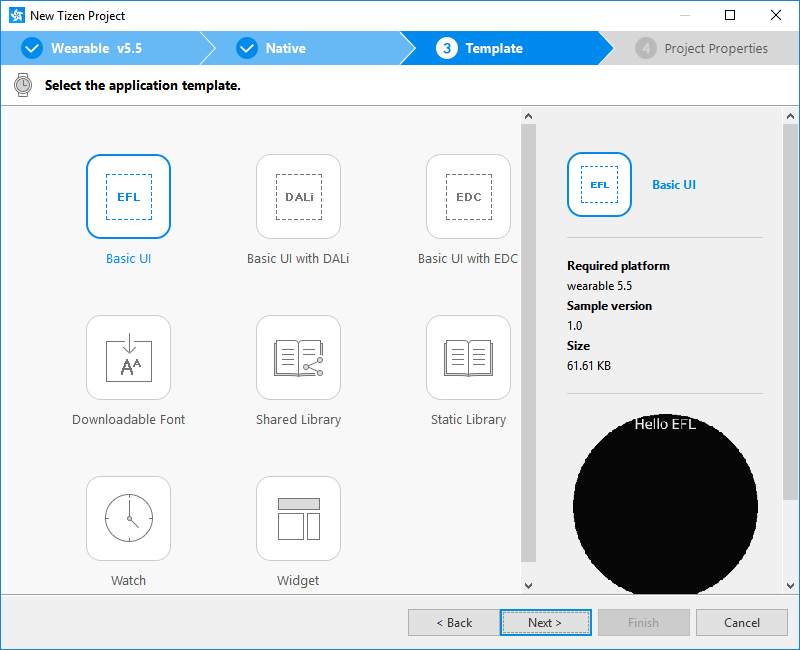
Select the Basic UI template and click Next.
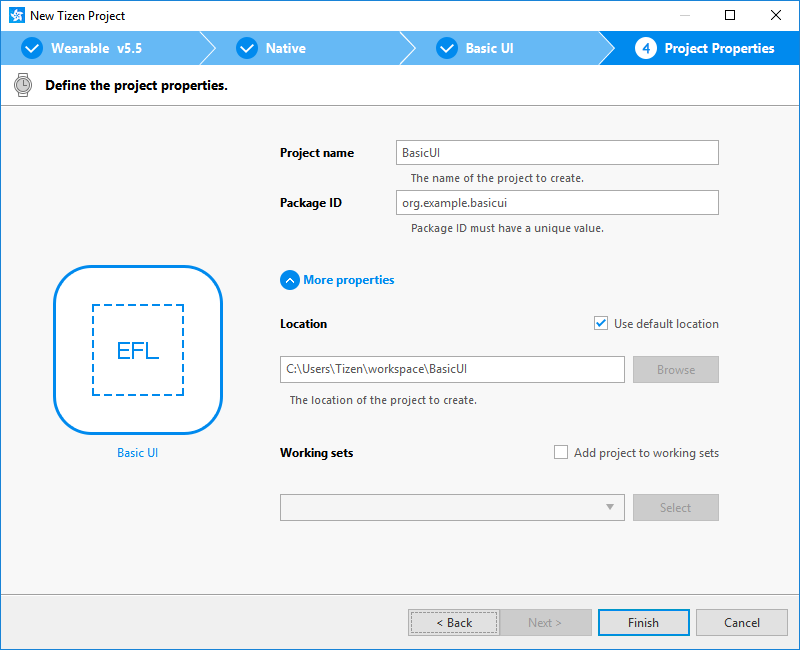
Define the project properties and click Finish.
You can enter the project name (3-50 characters) and the unique package ID. You can also select the location and working sets by clicking More properties.
The Project Wizard sets up the project, creates the application files using the default content from the template, and closes. For more information on the Project Wizard and the available templates, see Creating Tizen Projects with Tizen Project Wizard.
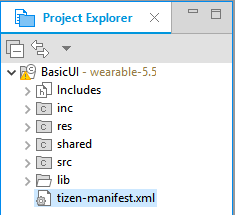
You can see the created project in the Project Explorer view. The most important files and folders include:
inc: Default folder for included source files
res: Folder for resource files used by the application only
shared: Folder for resource files to be shared with other applications
src: Folder for source code files
lib: Folder for external library files
tizen-manifest.xml: Manifest file used by the platform to install and launch the application
Your application project is now ready for further actions. Next, build the application.
Managing the Application Configuration
To view and modify the application configuration:
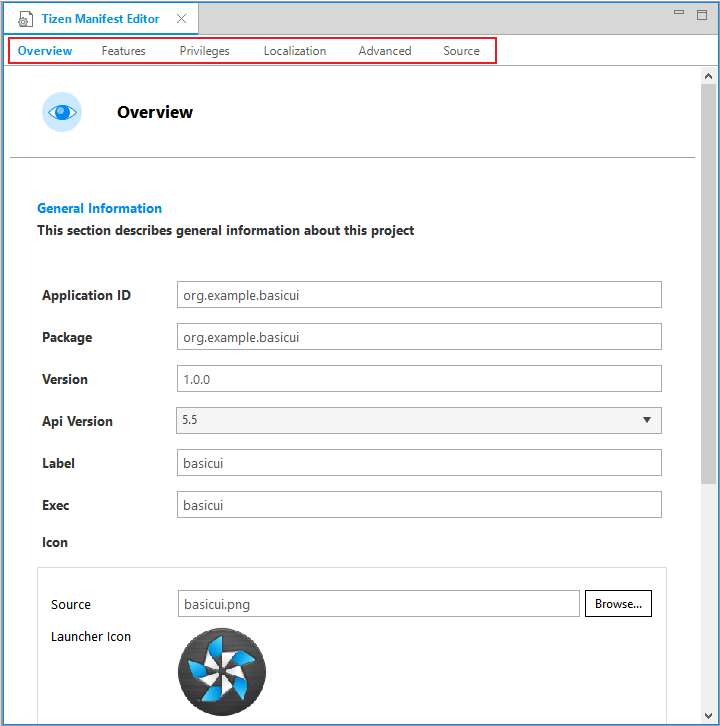
In the Project Explorer view, double-click the tizen-manifest.xml file of the application. The Tizen Studio opens the file in the manifest editor.
In the manifest editor, view and modify the configuration details using the various tabs:
Overview: Define general information, such as the package, label, and icon of the application.
Features: Define required software and hardware features. This information is used for application filtering in the Tizen Store.
Privileges: Define the security-sensitive APIs or API groups accessed and used by the application.
Localization: Define localized values for the application label, description, and icon.
Advanced: Define advanced features, such as application metadata, data control for services, application control functionalities, and account details.
Source: View and edit the source code of the tizen-manifest.xml file. Changes made and saved on the other tabs are reflected in the source code and vice versa.
Note :
The tizen-manifest.xml file must conform to both the XML file format and the Tizen native application specification requirements. Editing the file in the Source tab is intended for advanced users only.
To save any changes, in the Tizen Studio menu, select File > Save All.
Pay attention to the life-cycle callbacks in the application source code, to understand how the application works. For source code details related to the UI, see Designing a Simple UI.
The main() function in the src/basicui.c file is used to register callbacks that manage specific parts of the application life-cycle:
app_create
Called when the application process starts.
Used to create UI components.
app_terminate
Called while the application process is terminating.
Called after the main loop quits.
app_resume (UI applications only)
Called when the application window is shown.
app_pause (UI applications only)
Called when the application window is totally hidden.
app_control
Called after the app_create callback when the process starts.
Called when a launch request is received while the process is running.
Can receive app_control data (parameters for launching the application).
Used to implement parameter-specific actions of the application.
int
main(int argc, char *argv[])
{
    appdata_s ad = {0,};
    int ret = 0;

    ui_app_lifecycle_callback_s event_callback = {0,};
    app_event_handler_h handlers[5] = {NULL,};

    event_callback.create = app_create;
    event_callback.terminate = app_terminate;
    event_callback.pause = app_pause;
    event_callback.resume = app_resume;
    event_callback.app_control = app_control;

    ret = ui_app_main(argc, argv, &event_callback, &ad);
    if (ret != APP_ERROR_NONE)
        dlog_print(DLOG_ERROR, LOG_TAG, "app_main() failed. Err = %d", ret);

    return ret;
}
Building Your Application
After you have created the application project, you can implement the required features. In this example, only the default features from the project template are used, and no code changes are required.
When your application code is ready, you must build the application. The building process performs a validation check and compiles your files.
You can build the application in the following ways:
Automatically
The automatic build means that the Tizen Studio automatically rebuilds the application whenever you change a source or resource file and save the application project.
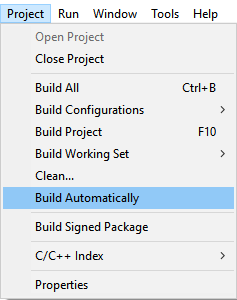
To use the automatic build:
Select the project in the Project Explorer view.
In the Tizen Studio menu, select Project > Build Automatically.
A check mark appears next to the menu option.
You can toggle the automatic build on and off by reselecting Project > Build Automatically.
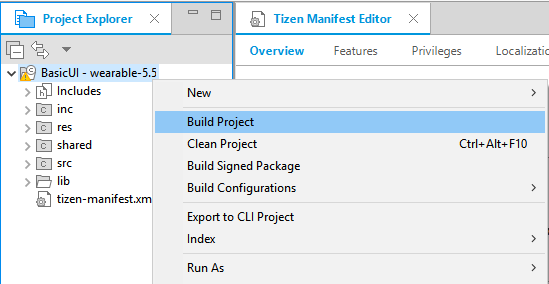
Manually
The manual build means that you determine yourself when the application is built.
To manually build the application, right-click the project in the Project Explorer view and select Build Project.
Figure: Manually building the application
Alternatively, you can also select the project in the Project Explorer view and do one of the following:
In the Tizen Studio menu, select Project > Build Project.
Press the F10 key.
You can have more than one build configuration. To see the current active configuration or change it, right-click the project in the Project Explorer view and select Build Configurations > Set Active. The default configuration is Debug. For more information, see Building Applications.
After you have built the application, run it.
Running Your Application
You can run the application on the emulator or a real target device.
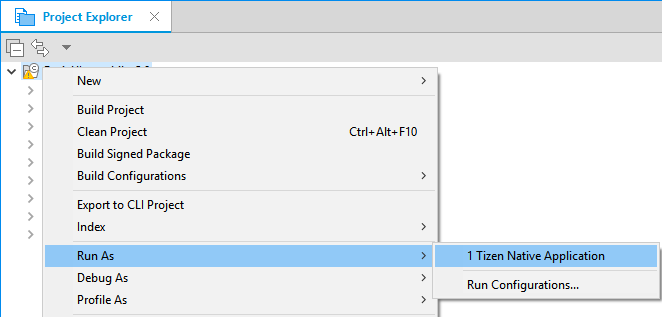
In the Project Explorer view, right-click the project and select Run As > Tizen Native Application.
Alternatively, you can also select the project in the Project Explorer view and do one of the following:
Press the Ctrl + F11 key.
Click the run icon in the toolbar.
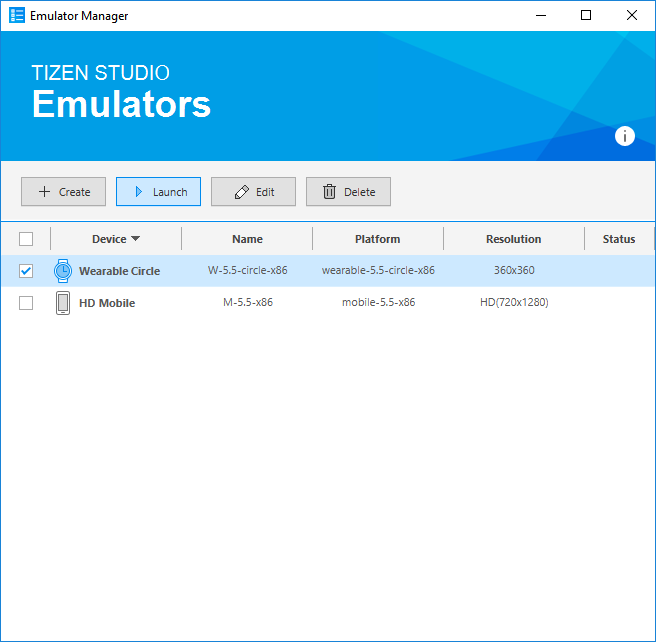
If you have created multiple emulator instances, select the instance you want from the combo box in the toolbar before selecting to run the application. If you select an offline emulator, it is automatically launched when you select to run the application.
Confirm that the application launches on the emulator.
Note :
If the emulator display has switched off, you cannot see the application launch. To switch the display on, click the Power key (in the lower-right corner of the emulator).
While the application is running, the **Log** view in the Tizen Studio shows the log, debug, and exception messages from the methods defined in the log macros. To see the view, in the Tizen Studio menu, go to **Window \> Show View \> Log**.
Connect the wearable target device to your computer:
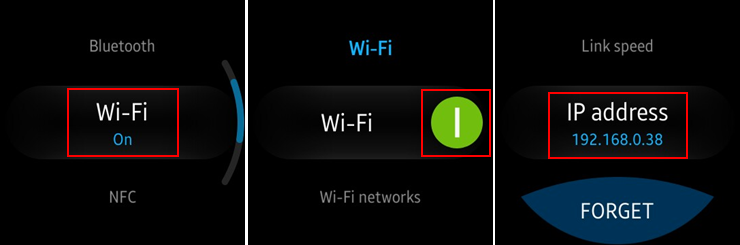
Define settings on the device:
Go to Settings > Connections, and switch on Wi-Fi.
The device and the computer must be connected to the same Wi-Fi network.
Note the IP address the device is using.
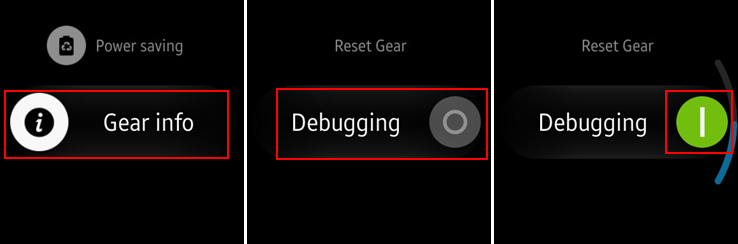
Go to Settings > Gear info, and switch on the debugging mode.
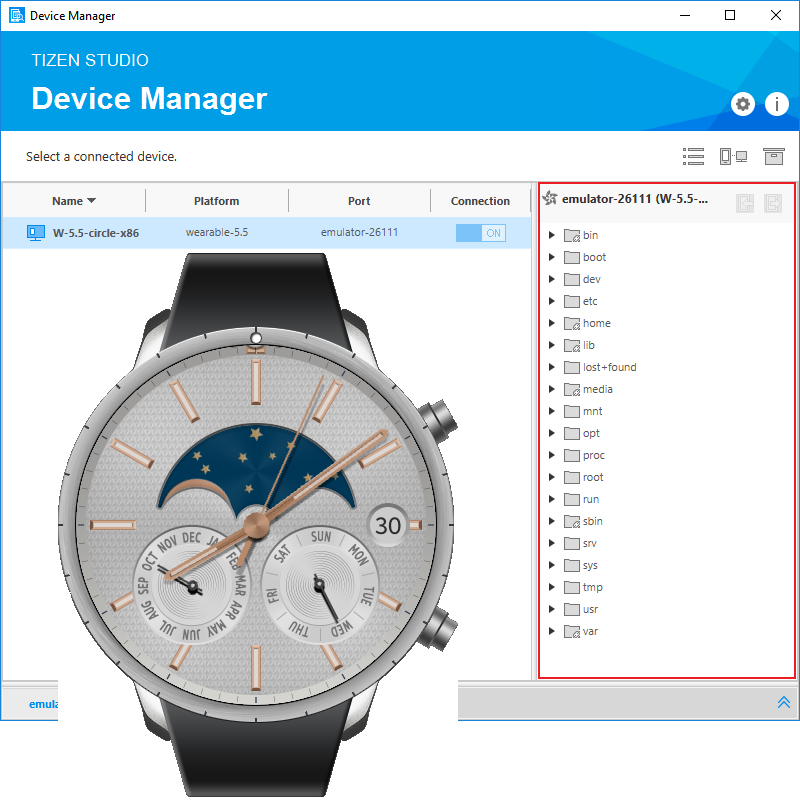
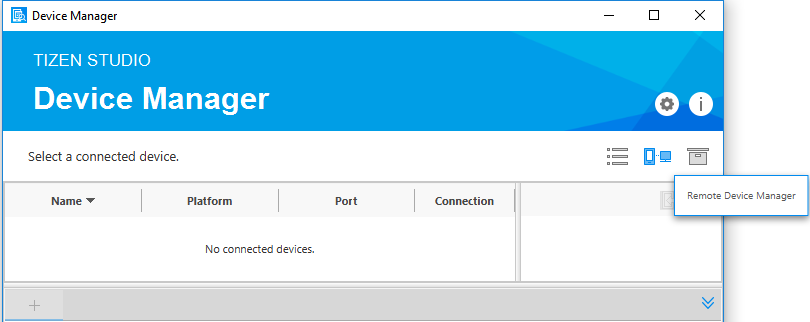
Use the Remote Device Manager to connect the wearable device:
In the Device Manager, launch the Remote Device Manager by clicking the related icon.
In the Remote Device Manager window, click +.
In the Add Device window, enter the device and network details (use the IP address you noted before), and click Add.
In the Remote Device Manager window, switch the new device on by clicking the switch under Connect.
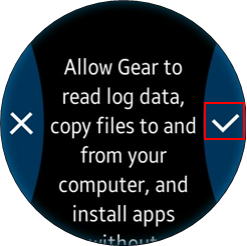
The device asks for user confirmation. To allow Gear to read log data, copy files to and from your computer, and install the application manually, click the accept mark.
In the Device Manager, confirm that the device is connected (shown in the device list).
In Project Explorer view, right-click the project and select Run As > Tizen Native Application.
Alternatively, you can also select the project in the Project Explorer view and do one of the following:
Press the Ctrl + F11 key.
Click the run icon in the toolbar.
If you have both a connected device and existing emulator instances, select the device from the combo box in the toolbar before selecting to run the application.
Confirm that the application launches on the target device.
Note :
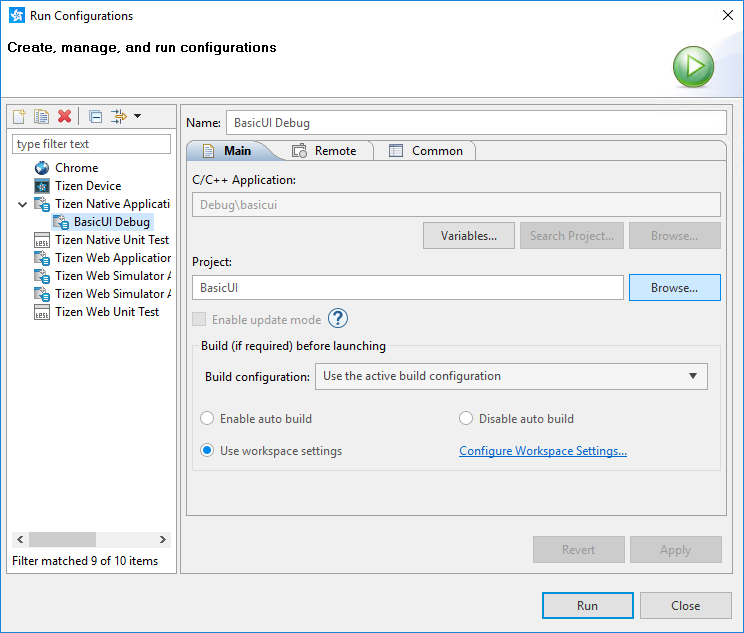
The application is launched using the default debug run configuration. To create and use another configuration:
In the Project Explorer view, right-click the project and select Run As > Run Configurations.
In the Run Configurations window, click the New Launch Configuration icon (), define the configuration details, and launch the application by clicking Run.
Designing a Simple UI
The wearable application created with the Basic UI template has a simple user interface with a label component showing the Hello Tizen text at the top of the screen. The UI is created using EFL.
Figure: User interface in the Basic UI template
Creating the Basic UI
The UI in the Basic UI template contains the following components:
The EFL UI always contains a window component, which is the root component of the entire UI.
Since the application has the indicator bar at the top of the screen, it requires the conformant component.
The text label is implemented with a label component.
The UI is created in the basicui.c file:
Data structure
A pointer to the UI components is stored in the appdata_s data structure:
The app_create() life-cycle callback is called when the application main loop starts, and it calls the create_base_gui() function to create the UI:
static bool
app_create(void *data)
{
    /*
       Hook to take necessary actions before the main event loop starts
       Initialize UI resources and application data
       If this function returns true, the application main loop starts
       If this function returns false, the application is terminated
    */
    appdata_s *ad = data;

    create_base_gui(ad);

    return true;
}
UI components
The create_base_gui() function creates the UI components: window, conformant, and label.
The function receives a pointer to fill in the appdata_s structure.
static void
create_base_gui(appdata_s *ad)
{
The window component is created with the elm_win_util_standard_add() function.
Callbacks are also added for the window: one of the callbacks handles the delete,request event when the window is to be closed, and the other handles the EEXT_CALLBACK_BACK event when the hardware Back key is pressed.
    /*
       Window
       Create and initialize elm_win, which is mandatory to manipulate a window
    */
    ad->win = elm_win_util_standard_add(PACKAGE, PACKAGE);
    elm_win_autodel_set(ad->win, EINA_TRUE);

    if (elm_win_wm_rotation_supported_get(ad->win)) {
    	int rots[4] = {0, 90, 180, 270};
    	elm_win_wm_rotation_available_rotations_set(ad->win, (const int *)(&rots), 4);
    }
    evas_object_smart_callback_add(ad->win, "delete,request", win_delete_request_cb, NULL);
    eext_object_event_callback_add(ad->win, EEXT_CALLBACK_BACK, win_back_cb, ad);
The conformant component is needed to show the indicator bar at the top of the screen:
The component is the first object added inside the window with the elm_conformant_add() function.
The elm_win_indicator_mode_set() function decides whether the indicator is visible, and the elm_win_indicator_opacity_set() function sets the indicator opacity mode.
The conformant component is set as a resize object of the window by using the elm_win_resize_object_add() function. It means that the conformant size and position are controlled by the window component directly.
The evas_object_show() function makes the conformant component visible.
    /*
    Conformant
    Create and initialize elm_conformant, which is mandatory for the base GUI
    to have a proper size when an indicator or virtual keypad is visible
    */
    ad->conform = elm_conformant_add(ad->win);
    elm_win_indicator_mode_set(ad->win, ELM_WIN_INDICATOR_SHOW);
    elm_win_indicator_opacity_set(ad->win, ELM_WIN_INDICATOR_OPAQUE);
    evas_object_size_hint_weight_set(ad->conform, EVAS_HINT_EXPAND,
    								EVAS_HINT_EXPAND);
    elm_win_resize_object_add(ad->win, ad->conform);
    evas_object_show(ad->conform);
The label component for the text is added with the elm_label_add() function. The label is added inside the conformant component, which is the label's parent.
The label text is set with the elm_object_text_set() function.
    /*
    Label
    Create an actual view of the base GUI
    Modify this part to change the view
    */
    ad->label = elm_label_add(ad->conform);
    elm_object_text_set(ad->label, "<align=center>Hello Tizen</align>");
    evas_object_size_hint_weight_set(ad->label, EVAS_HINT_EXPAND,
    								EVAS_HINT_EXPAND);
    elm_object_content_set(ad->conform, ad->label);
When all the UI components are ready, the evas_object_show() function makes the window component visible. This means that the window displays everything on the screen at once.
    /* Show the window after the base GUI is set up */
    evas_object_show(ad->win);
}
Modifying Existing Components
When the basic UI exists, you can easily modify the components in the UI by using the component-specific functions, or more general Evas object functions.
For example, the following modifications to the label component change the label style to a marker (making the text bold) and increase the font size to 50:
The basic UI only contains one visible label component. You can use it as a basis to design a more elaborate UI with more components, screens, and functionality. The following example shows how to add a list to the existing view (screen), and how to create a second view and move between the 2 views.
All the code changes in this section are made within the create_base_gui() function, unless stated otherwise.
To add more content to the UI:
Modify the existing label view to contain a list too.
To add more components, first create a container that can hold all the various components in one view.
In this example, the box container is used. It is created and added to the conformant. The new list is created, and then the new list and the existing label component are both added to the box.
Add the box and list objects to the appdata_s data structure:
Modify the existing label component to use box as a parent, and add it to the box:
/* Modify the label code */
ad->label = elm_label_add(ad->box);
elm_object_text_set(ad->label, "<align=center>Hello Tizen</align>");
evas_object_size_hint_weight_set(ad->label, 0.0, 0.0);
/* Comment out the elm_object_content_set() function */
/* elm_object_content_set(ad->conform, ad->label); */
evas_object_size_hint_align_set(ad->label, EVAS_HINT_FILL, EVAS_HINT_FILL);
evas_object_size_hint_min_set(ad->label, 50, 50);
/* Show and add to box */
evas_object_show(ad->label);
elm_box_pack_end(ad->box, ad->label);
Create the list and add it to the box:
Create a list component with the elm_list_add() function.
The box component is the parent of the new list component.
Add items to the list with the elm_list_item_append() function.
int i;
/* Create the list */
ad->list = elm_list_add(ad->box);
/* Set the list size */
evas_object_size_hint_weight_set(ad->list, EVAS_HINT_EXPAND, EVAS_HINT_EXPAND);
evas_object_size_hint_align_set(ad->list, EVAS_HINT_FILL, EVAS_HINT_FILL);

for (i = 0; i < 4; i++) {
    char tmp[8];
    snprintf(tmp, sizeof(tmp), "Item %d", i + 1);
    /* Add an item to the list */
    elm_list_item_append(ad->list, tmp, NULL, NULL, NULL, NULL);
}
/* Show and add to box */
evas_object_show(ad->list);
elm_box_pack_end(ad->box, ad->list);
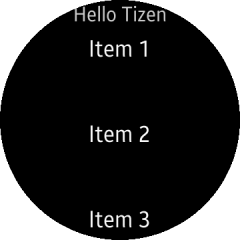
When you run the application, the screen now shows the label at the top and the list in the middle.
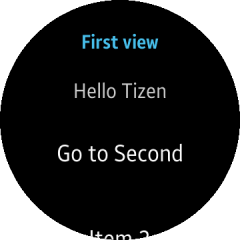
Create another view and navigate between the views.
The previous step created a view that contained a box component with a list component in the box. To create an application with multiple views, you need to add a naviframe component to the application.
Add the naviframe and naviframe item objects to the appdata_s data structure:
Create the navigation between the views by adding a clicked,double event callback to the list. When the user double-clicks the item, the second view opens.
For clarity, change the first list item text to Go to Second.
/* Change the first list item text */
Elm_Object_Item *it;
it = elm_list_first_item_get(ad->list);
elm_object_item_text_set(it, "Go to Second");
/* Add a callback */
evas_object_smart_callback_add(ad->list, "clicked,double",
                               list_item_doubleclicked_cb, ad->navi);
In the list item double-click event callback, define the content for the second view.
Create a Prev button to return to the first view, and push the button to the naviframe as a new top item. Also create the Prev button callback for popping the top item from the naviframe, and consequently displaying the first view.
Add both the new functions before the create_base_gui() function.
We use cookies to improve your experience on our website and to show you relevant
advertising. Manage you settings for our cookies below.
Essential Cookies
These cookies are essential as they enable you to move around the website. This
category cannot be disabled.
Company
Domain
Samsung Electronics
developer.samsung.com, .samsung.com
Analytical/Performance Cookies
These cookies collect information about how you use our website. for example which
pages you visit most often. All information these cookies collect is used to improve
how the website works.
Company
Domain
Samsung Electronics
.samsung.com
Functionality Cookies
These cookies allow our website to remember choices you make (such as your user name, language or the region your are in) and
tailor the website to provide enhanced features and content for you.
Company
Domain
Samsung Electronics
developer.samsung.com, google.account.samsung.com
Preferences Submitted
You have successfully updated your cookie preferences.


 ), define the configuration details, and launch the application by clicking