Most Tizen .NET TV applications have a UI. The Tizen .NET TV framework supports the following application UI models:
Tizen.NUI
Tizen.NUI is a platform-optimized UI model, included with Tizen. It is based on a 2D/3D-unified UI model, enabling you to implement rich controls and motion effects. If you want the application to support various Tizen devices, use Tizen.NUI. For more information on Tizen.NUI, see Natural User Interface.
Xamarin.Forms
Xamarin.Forms is a cross-platform UI model maintained by Xamarin Inc. and the open-source community. It supports XAML and is recommended if you want the application to support devices on various platforms.
The following sections describe how to implement basic application functionality using Xamarin.Forms.
Handling Application State Change Events
You can implement code that is run at various stages of the application life-cycle.
In the <projectname> (Portable) project, the <projectname>.cs file contains 3 virtual methods that can be overridden to handle application state change events:
The OnStart() event handler is called when the application starts.
The OnSleep() event handler is called when the application is sent to the background.
The OnResume() event handler is called when the application is resumed.
public class App : Application
{
  protected override void OnStart()
  {
    // Handle when your app starts
  }
  protected override void OnSleep()
  {
    // Handle when your app sleeps
  }
  protected override void OnResume()
  {
     // Handle when your app resumes
  }
}
In the <projectname>.Tizen.TV project, the <projectname>.Tizen.TV.cs file contains 5 virtual methods that can be overridden to handle application state change events:
TheOnCreate() event handler is called after the Run() method and used to initialize the UI..
TheOnAppControlReceived() event handler is triggered when the application is started to do something. It can be called several times during the lifespan of an application, and it shows the screen for the action requested. It requires specific information provided as parameters.
The OnPause() event handler is called when the application window is not visible.
The OnResume() event handler is called when the application window to be visible again.
The OnTerminate() event handler is called when the application is terminated. Saves work, releases resources, and exits.
For more information on the application life-cycle and state change events, see Application Management.
ImportantYou must call the base class method within the override. Otherwise, events are not emitted.
The Xamarin.Forms controls used to create the user interface of a Tizen .NET application can be broadly categorized into 4 groups:
"Pages" represent screens within an application. The UI of an application is built from 1 or more pages and with a navigation mechanism, if needed. The navigation scheme is specified by the INavigation interface. Many pages are of the ContentPage type, which describes the view of a single screen.
"Layouts" are containers used to compose views into logical structures. Some available types are absolute, grid, relative, and stack layouts; each provides mechanisms, such as orientation, spacing, and padding, to control the layout. The StackLayout class is a basic layout where you can simply stack controls on top of, or side-by-side, one another. Layouts can also be bundled with and nested into each other.
"Views" are the controls displayed on the user interface, such as labels, buttons, and text entry boxes.
"Cells" are specialized elements used for items in tables and lists, which help describe how the items must be rendered.
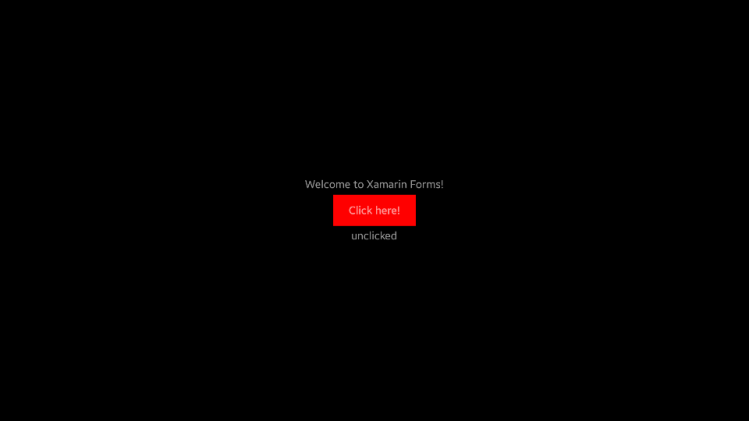
The following example uses the "Blank App (Tizen Xamarin.Forms Portable)" template as a basis. It shows you how to modify the existing code to add a button and a label that changes when the button is clicked. For more information on creating, building, and running the template application, see Creating .NET TV Applications.
The "Blank App" application uses a label which displays text in an area of the screen. The properties inherited from the base classes of Label give control over the display: font attributes, families, and sizes, as well as layout options. Modify the application by adding a button control. It is similar to the label, but is specifically designed to react to click events. As a result, the Button class defines the Clicked event, which tells the application what to do when the click event takes place.
In order to do something visible on the screen to show that you have received the click event, define another label. Give the new label a value to be displayed in the initial state, and make the button click event handler update the text and button color once the click event triggers.
To modify the application by adding a button and label:
Since the click event triggers outside the class constructor, declare the label, the button, and a click counter at the class level (lines 11-13).
Instantiate a generic button (line 17), and add the OnButtonClicked() event handler to the button's Clicked event (line 23):
Create a new label, and give it a value to be displayed in the initial state by setting the Text property (lines 24-28).
Include the button and label as children of the StackLayout instance (lines 41-42), so they are stacked below the label from the original application.
Define the OnButtonClicked() event handler (lines 48-53).
Increment the click counter, build a string showing how many times the button has been clicked, and set the Text property of the new label to that string.
Just for visual effect, you can also set the button background color to something different than the initial color set when the button was instantiated.
using System;
using System.Collections.Generic;
using System.Linq;
using System.Text;
using Xamarin.Forms;

namespace XamarinApp
{
  public class App : Application
  {
    Label label;
    Button button;
    int clicks = 0;

    public App()
    {
      button = new Button
      {
        Text = "Click here!",
        BackgroundColor = Color.Red,
        HorizontalOptions = LayoutOptions.Center,
      };
      button.Clicked += OnButtonClicked;
      label = new Label
      {
        Text = "unclicked",
        HorizontalOptions = LayoutOptions.Center,
      };

      // The root page of your application
      MainPage = new ContentPage
      {
        Content = new StackLayout
        {
          VerticalOptions = LayoutOptions.Center,
          Children = {
            new Label {
              HorizontalTextAlignment = TextAlignment.Center,
              Text = "Welcome to Xamarin Forms!"
            },
            button,
            label
          }
        }
      };
    }

    void OnButtonClicked(object s, EventArgs e)
    {
      clicks += 1;
      label.Text = String.Format("Number of clicks: {0}", clicks);
      button.BackgroundColor = Color.White;
    }

    protected override void OnStart()
    {
      // Handle when your app starts
    }

    protected override void OnSleep()
    {
      // Handle when your app sleeps
    }

    protected override void OnResume()
    {
      // Handle when your app resumes
    }
  }
}
The following figures show what happens when you run the modified code. At startup, the button is red and the text below the button is "unclicked". After a couple of clicks, the click counter is displayed below the button, and the button color has changed.
Adding Application Resources
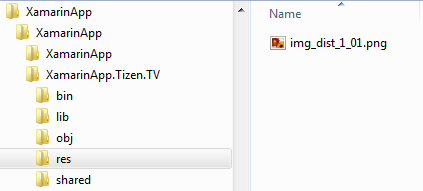
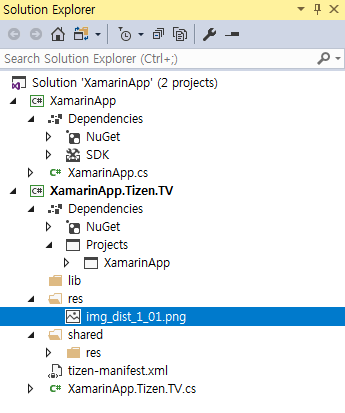
To add resources, such as images and audio files, to the TV application, place them in the "res" directory of the "Tizen.TV" project.
The resources are visible in the Visual Studio "Solution Explorer" view, and are included in the ".tpk" file when the project is built.
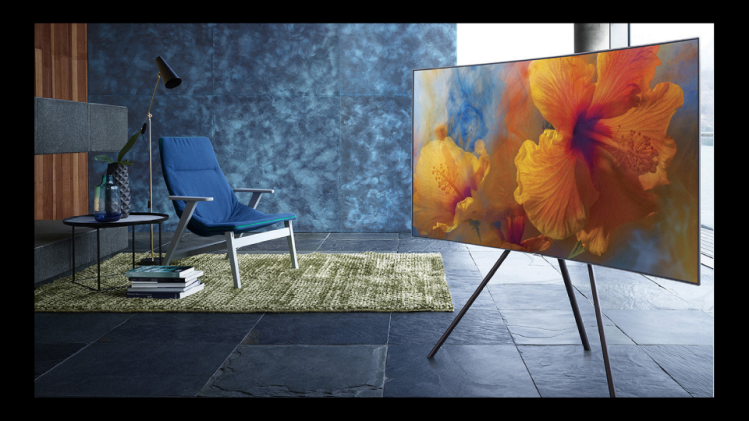
To implement an image in the application, create an Image instance and set the file path within the "res" directory as the source:
public class App : Application
{
  Image image = null;

  public App()
  {
    image = new Image
    {
      Source = "img_dist_1_01.png"
    };

    MainPage = new ContentPage
    {
      Content = new StackLayout
      {
        VerticalOptions = LayoutOptions.Center,
        Children = {
          image,
        }
      }
    };
  }
}
Manage Your Cookies
We use cookies to improve your experience on our website and to show you relevant
advertising. Manage you settings for our cookies below.
Essential Cookies
These cookies are essential as they enable you to move around the website. This
category cannot be disabled.
Company
Domain
Samsung Electronics
developer.samsung.com, .samsung.com
Analytical/Performance Cookies
These cookies collect information about how you use our website. for example which
pages you visit most often. All information these cookies collect is used to improve
how the website works.
Company
Domain
Samsung Electronics
.samsung.com
Functionality Cookies
These cookies allow our website to remember choices you make (such as your user name, language or the region your are in) and
tailor the website to provide enhanced features and content for you.
Company
Domain
Samsung Electronics
developer.samsung.com, google.account.samsung.com
Preferences Submitted
You have successfully updated your cookie preferences.